File Ingestion Using Autoloader(Python)-Tutorial
Configuring and Running the Template in Databricks#
This guide demonstrates how to set up and use the poc_template GitHub repository in Databricks. Follow the steps below.
Step 1: Type in this URL https://github.com/innersource-nn/poc_template_pub
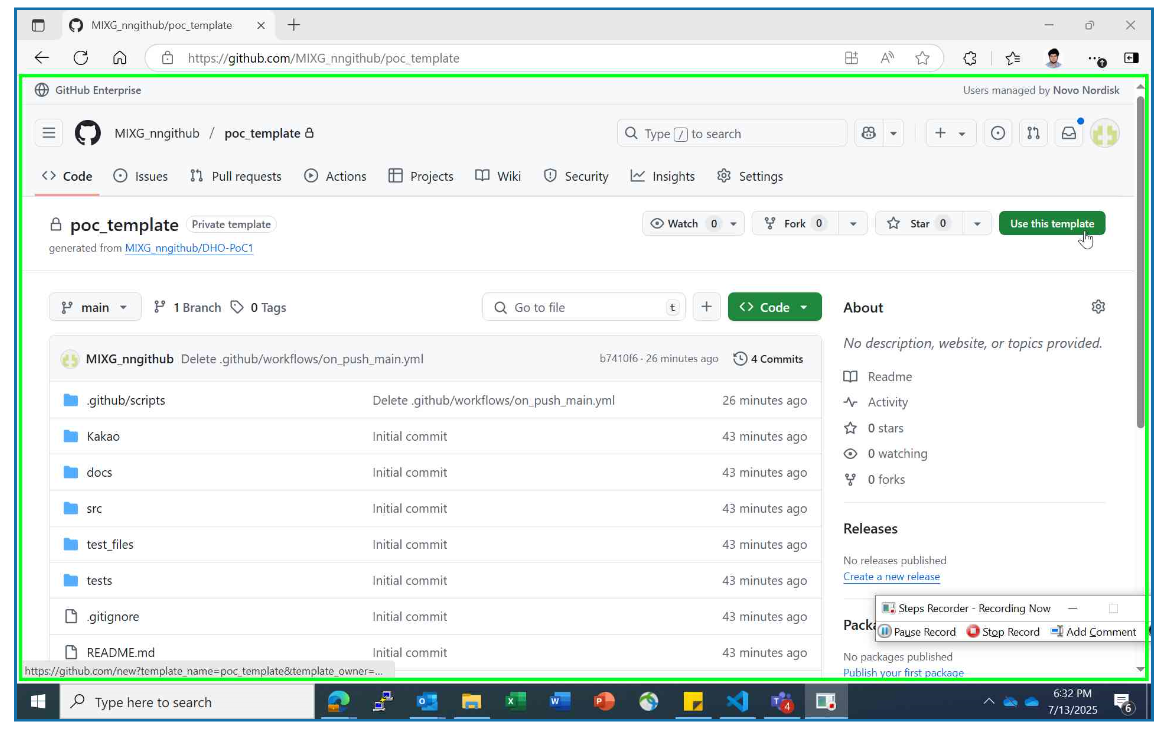
- Step 1: Click on Use this template
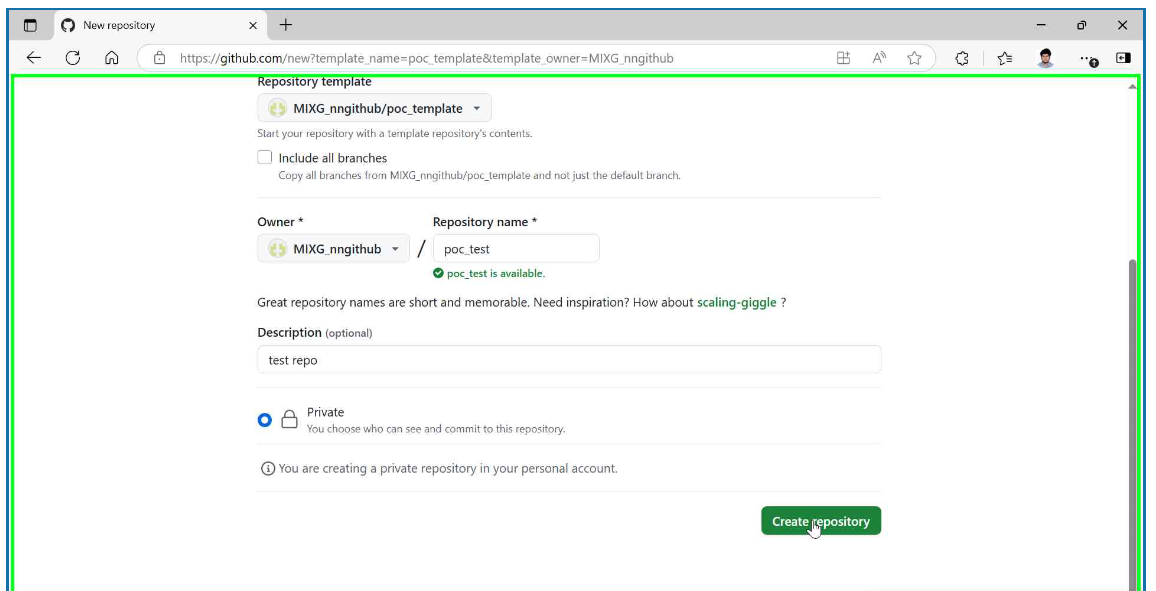
Step 2: Fill in Repository Details:
- Repository name: Use lowercase letters, numbers, and hyphens
- Owner: Select your personal account
- Description: Add a brief summary of your project
- Click on Create Repository

Step 3: Login into Databricks https://adb-2611332145766578.18.azuredatabricks.net/
- Step 1: Click on Profile
- Step 2: Click on settings
- Step 3: Click on Linked Accounts
- Note: Follow the numbers (1,2) marked in the image above for easy navigation
- Refer this Link for personal access token Generation Github Personal Access Token Documentation.
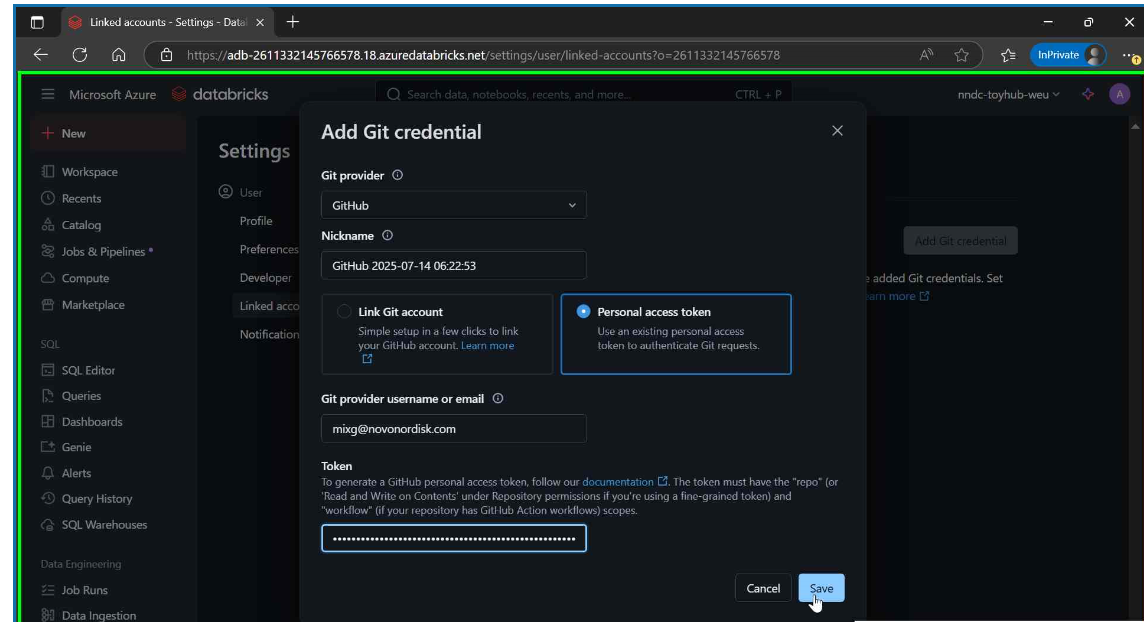
Step 4: Set up Git Credentials:
- Create Linked Account: Navigate to Account Settings
- Add Git Credential: Select from credential options
- Select Provider: Choose GitHub as your Git provider
- Authentication Method: Select Personal Access Token
- Configure Details:
- Enter your GitHub email address
- Paste your GitHub Personal Access Token
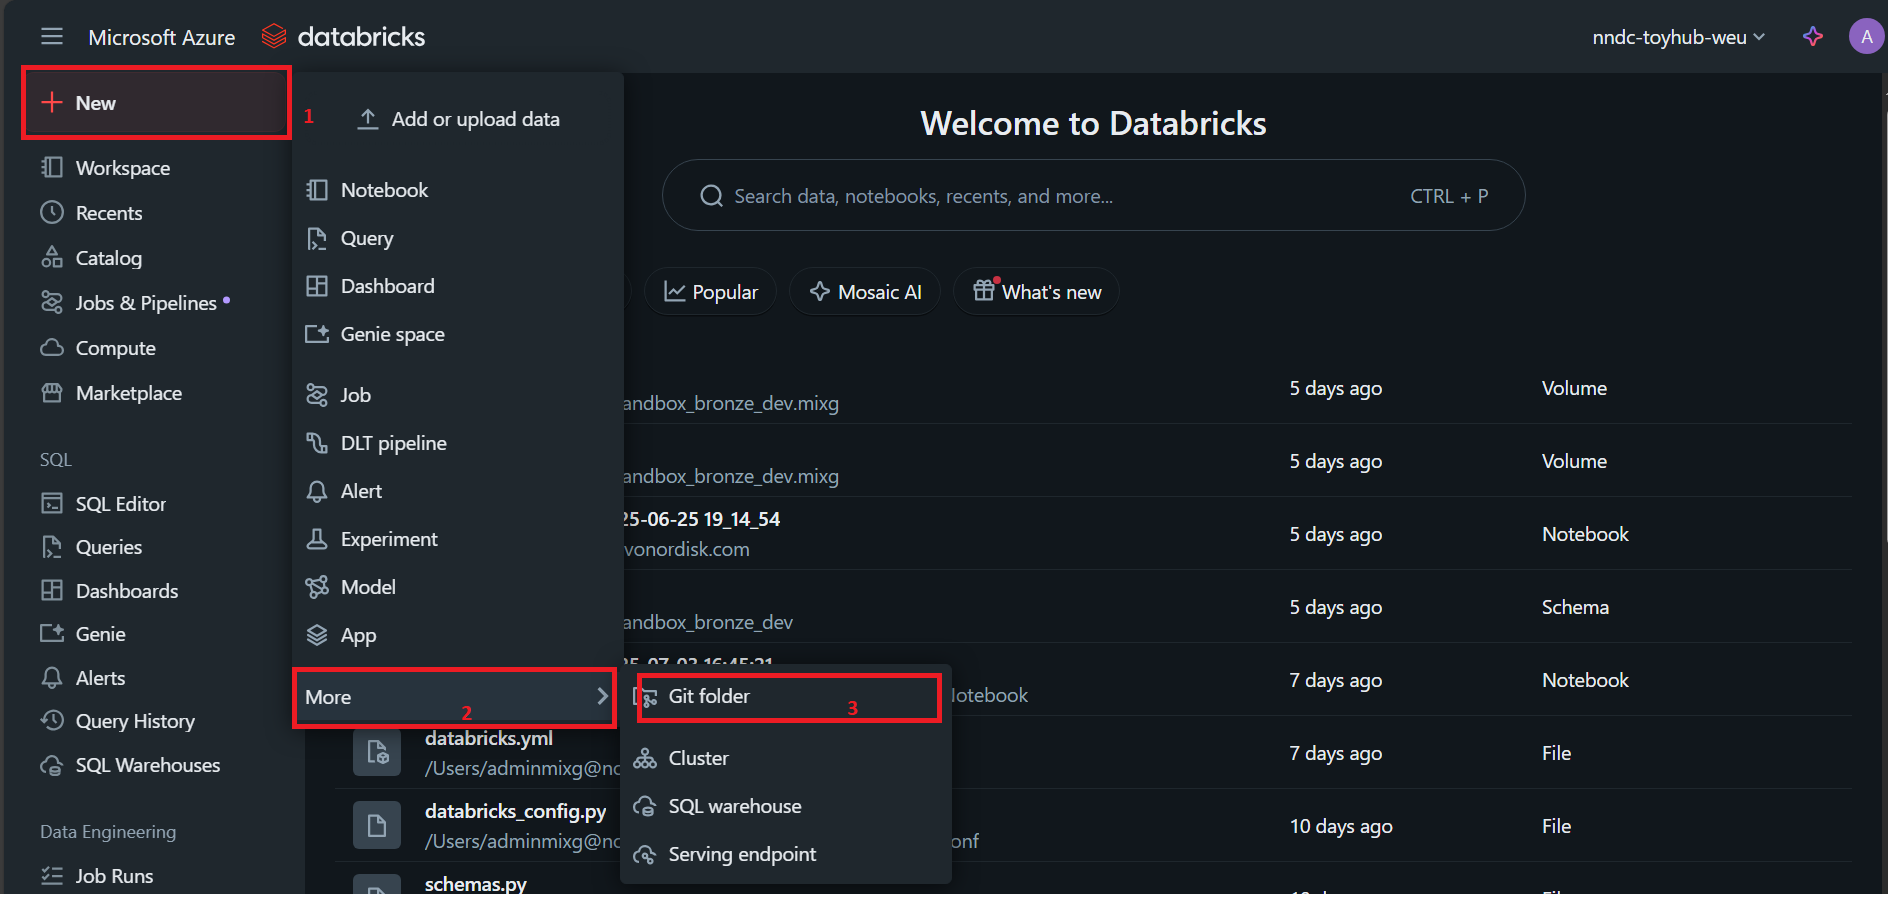
Step 5: Create Git Folder:
- Step 1: Click on New icon in the left sidebar
- Step 2: Click on More
- Step 3: Click on Git folder
- Note: Follow the numbers (1,2) marked in the image above for easy navigation
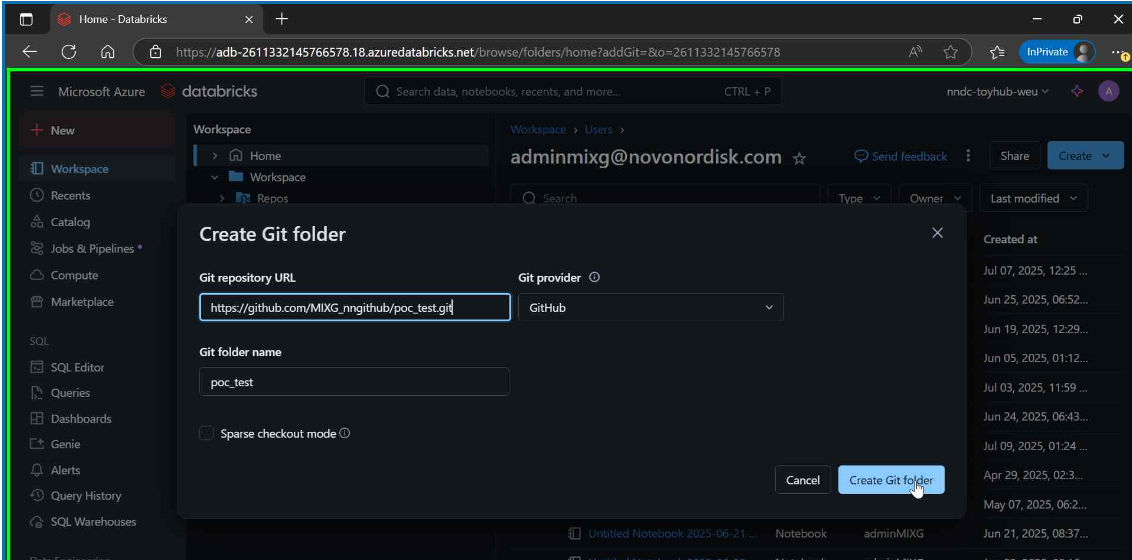
Step 6: Configure Git Folder Details:
- Git repository URL: Enter the URL of Git Created with .git as suffix
- Git Provider: Select GitHub from the dropdown
- Click on Create Repo to finish the setup
- Your Git folder will be created with the specified repository linked
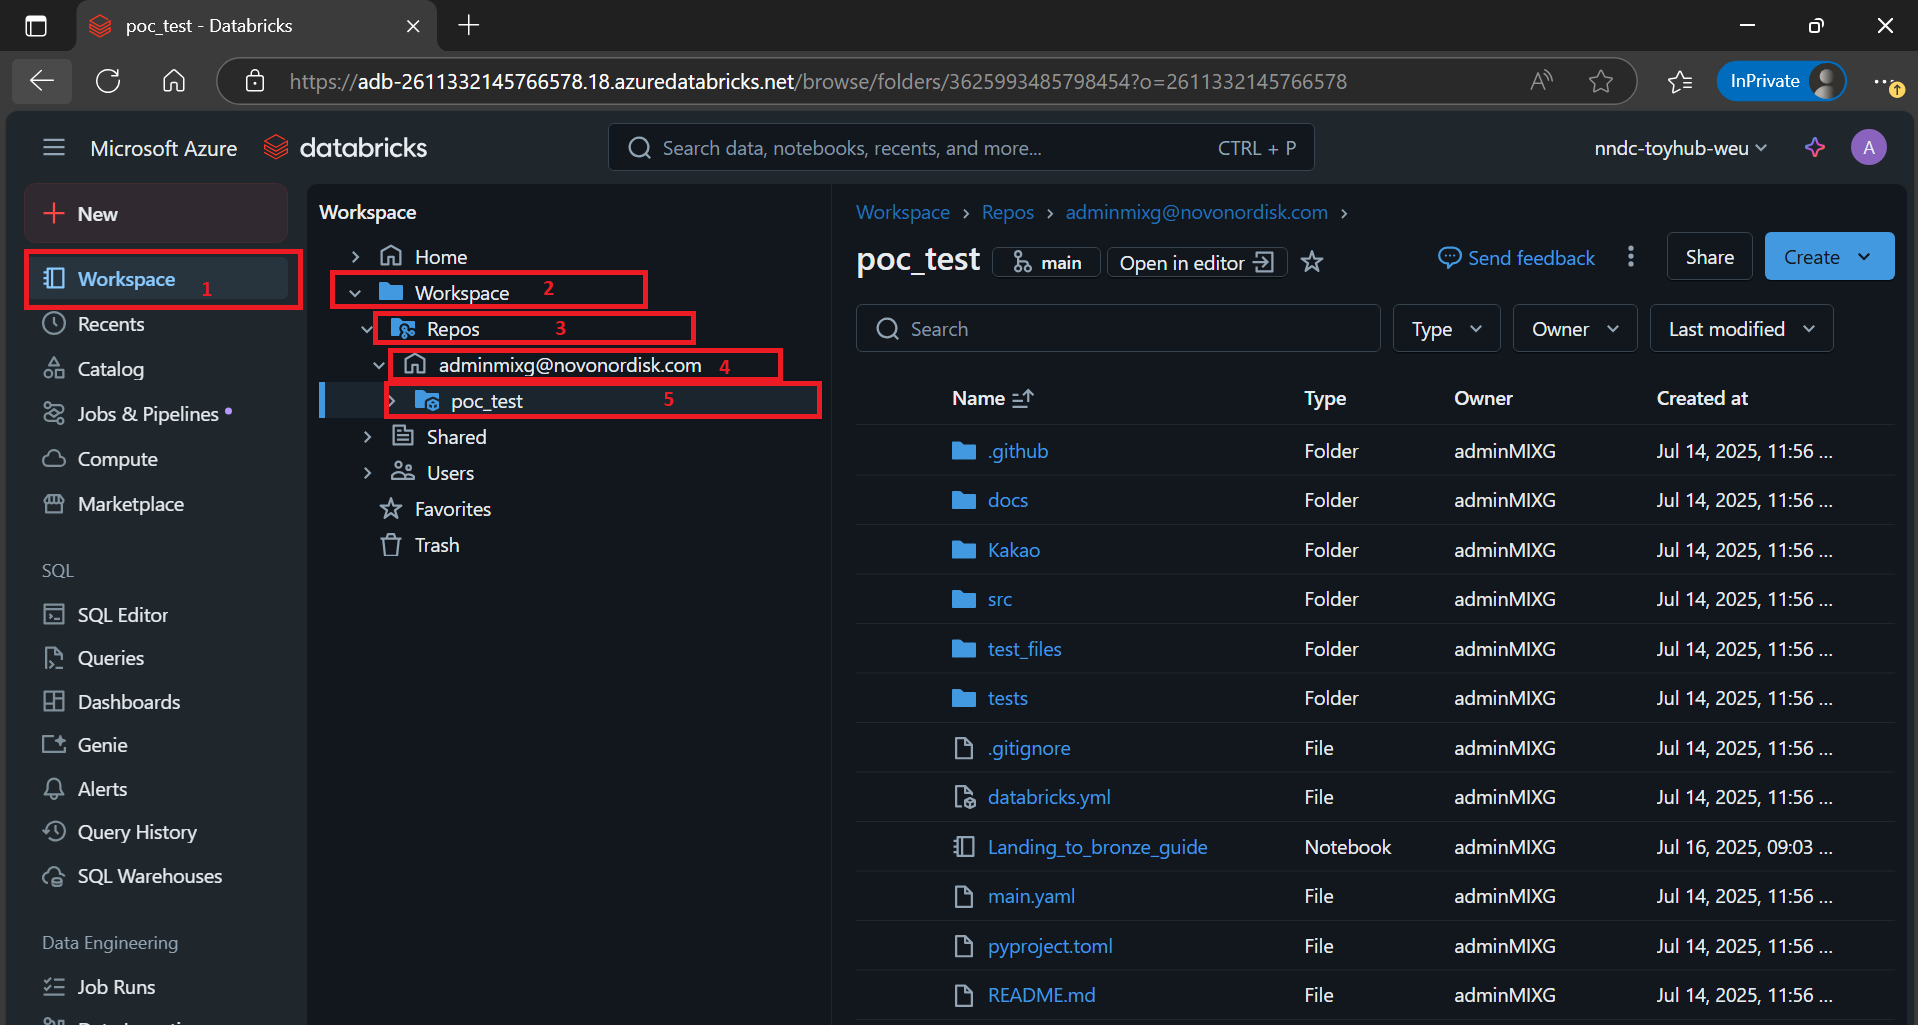
Step 7: Navigate to Workspace
- Step 1: Click on Workspace icon in the left sidebar
- Step 2: Click on Workspace folder
- Step 2: Click on Repo folder
- Step 2: Click on Folder with your username folder
- Step 3: Click on repo which you created and now on your right you will be able to see the contents of your repo folder
- Note: Follow the numbers (1,2) marked in the image above for easy navigation
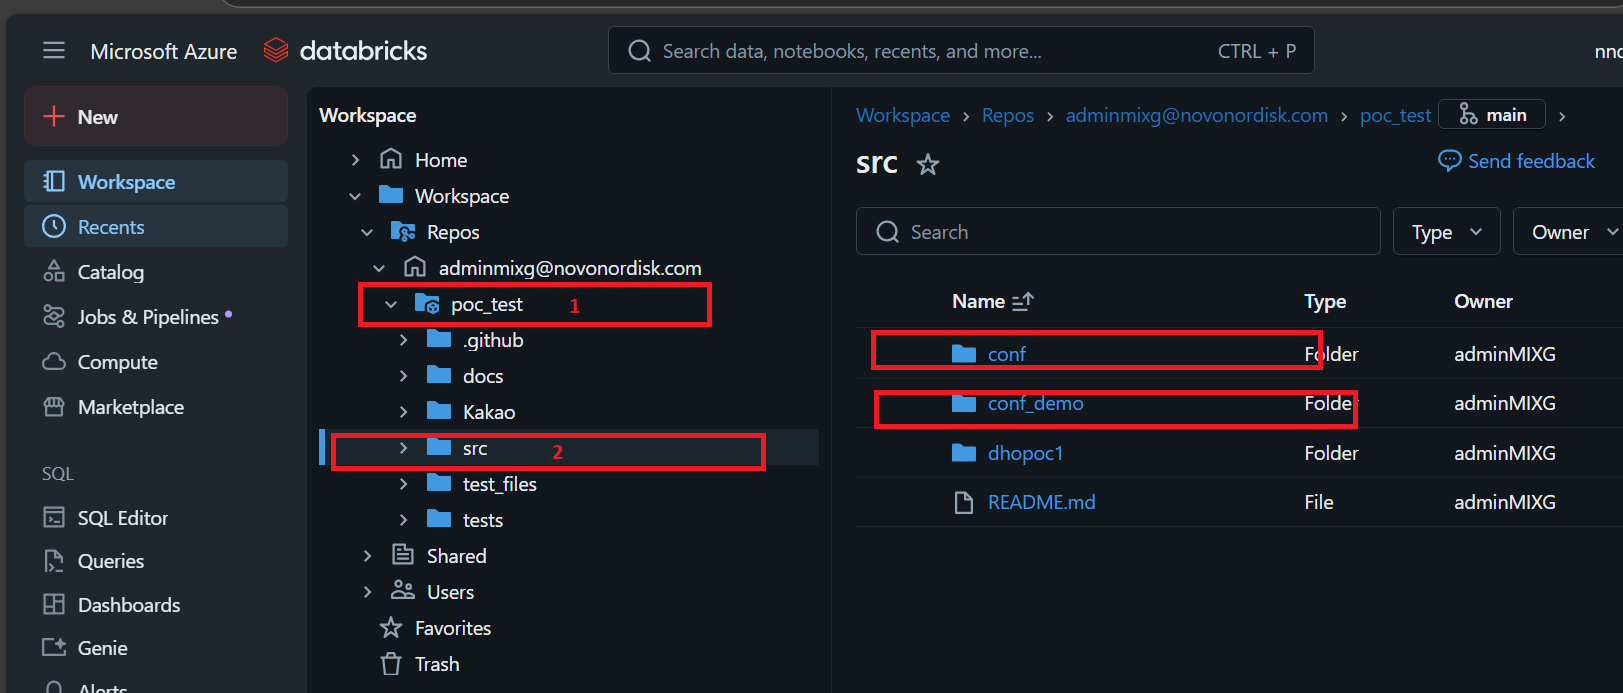
Step 8: Configuration Setup
- Keep existing
conffolder - Modify configuration files as per your requirements
- Set up your own table structures and configurations
- Ensure all parameters match your environment settings and run the jobs