Go to Playbook Main Page
Next: Concepts Covered in this playbook
Visual Studio Code Installation#
If you haven't already installed Visual Studio Code on your laptop, follow the step-by-step guide below.
Please select the installation instructions that match your operating system (Windows or macOS) and follow the carousel guide below.
Python Installation#
Coming soon
Git Installation#
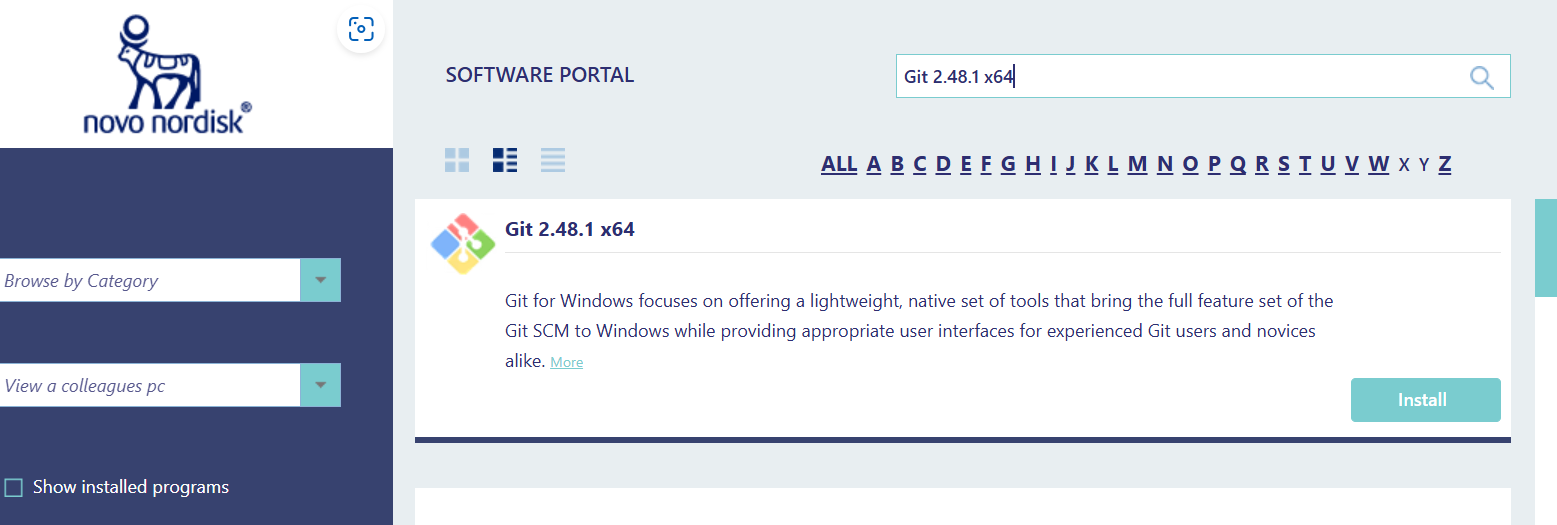
Step 1: Request Git Installation
- Go to NN Software portal and request for git installation
- Follow the on-screen instructions to complete the request
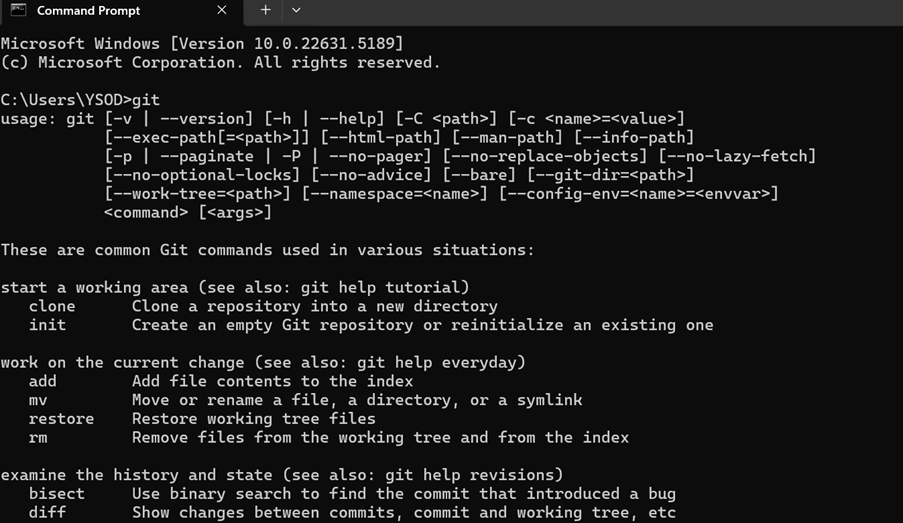
Step 2: Verify Git Installation
- Once installation is complete, open Command Prompt
- Type "git" and press Enter to confirm installation was successful
- You should see git command options as shown in the image
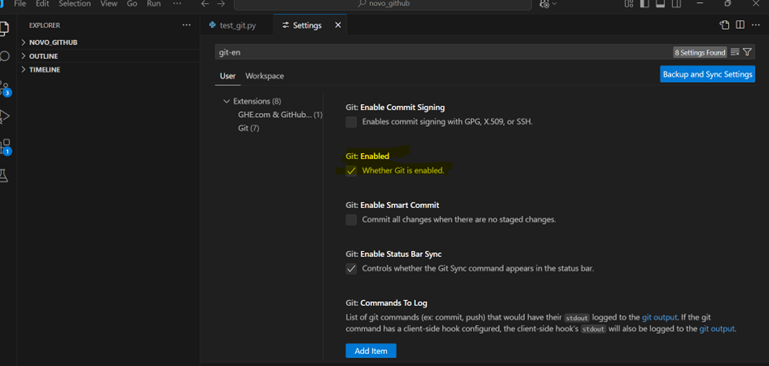
Step 3: Enable Git in VSCode
- Open VSCode Studio → Go to File → Preferences → Settings
- Search for the keyword 'git-enabled' in the settings search bar
- Ensure Git is enabled as shown in the image
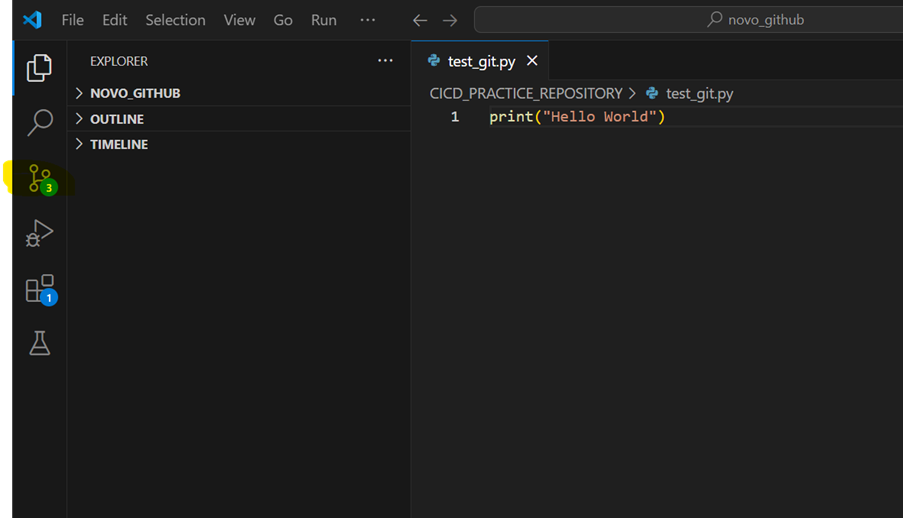
Step 4: Verify Source Control
- Once git is enabled, you can see the source control is also enabled
- The source control icon will appear in the left sidebar
- This allows you to track changes, commit files, and manage repositories
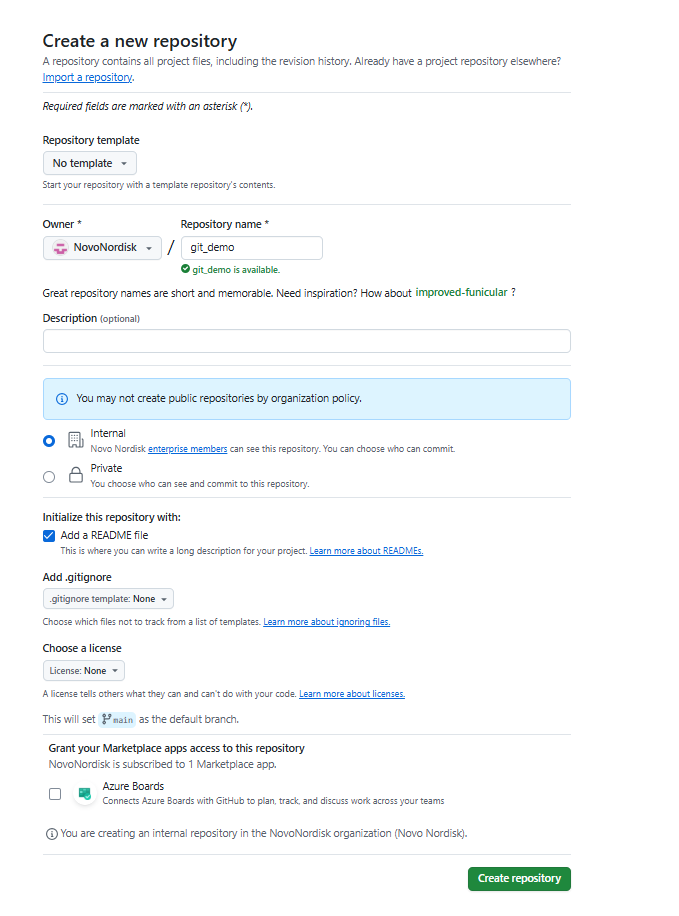
Step 5: Create and Clone Repository
- Create a repository in GitHub (in this example: 'git_demo')
- Copy the repository URL: https://github.com/NovoNordisk/git_demo.git
- You'll use this URL to clone the repository in VSCode
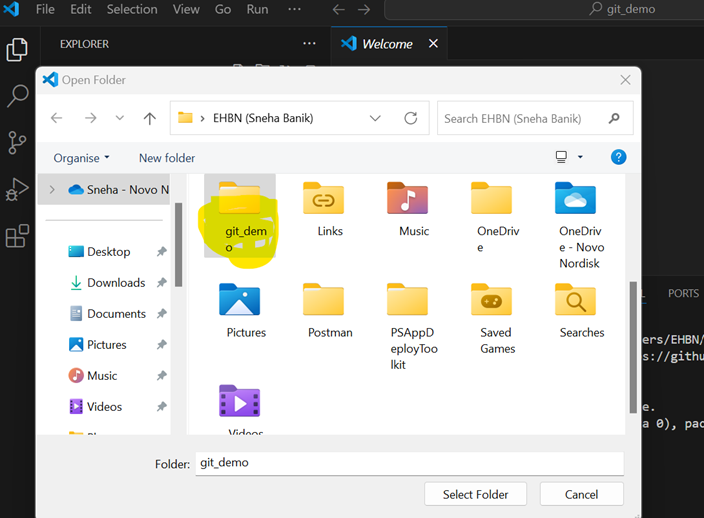
Step 6: Open Repository in VSCode
- In VSCode, go to File → Open Folder
- Navigate to and select the local 'git_demo' folder
- This connects your local folder with the Git repository
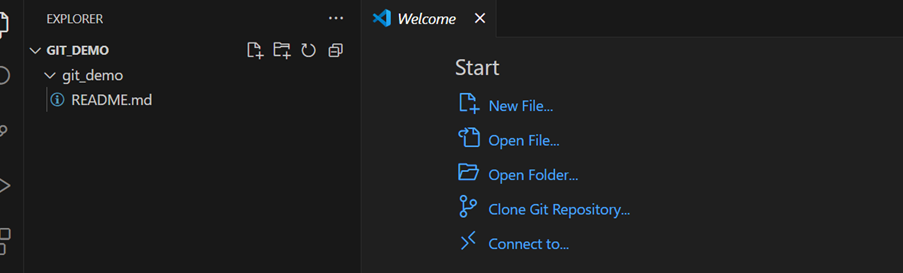
Step 7: Ready to Use
- Your VSCode is now connected to your Git repository
- You can now begin using Git features within VSCode
- Use the source control panel to commit changes, create branches, and more
You may be interested in a more detailed Git tutorial which can be found here
Go to Playbook Main Page
Next: Concepts Covered in this playbook