Go to Onboarding Topics Reference Go back to prerequisites
Working with Github#
What is git and github.com?#
Git is a tool for version control and code management. It tracks all the committed versions of your project, with each commit creating a snapshot of the project. These snapshots capture the state of the project, allowing easy tracking and recovery of changes. The directory containing your project and Git system files is called a repository (colloquially known as a repo).
While Git was originally developed for code versioning, it works equally well for documentation or any other data representable in plain text. Additionally, it can store non-structured data (e.g., images, archives), but its powerful string comparison features make it particularly suited for plain-text changes, enabling clear visualizations of differences between commits.
Git operates both locally and via remote Git repositories (repos) on a server. The typical workflow involves making changes locally and then using the push command to upload commits to a remote server. Novo Nordisk uses GitHub to store and manage its repositories.
All the following instructions pertain to working within Novo Nordisk's corporate GitHub space, though they are generally applicable to any Git environment.
How to install git#
Go to Git's official download page, select your operating system, download the installer, and/or follow the provided installation instructions.
Prerequisites#
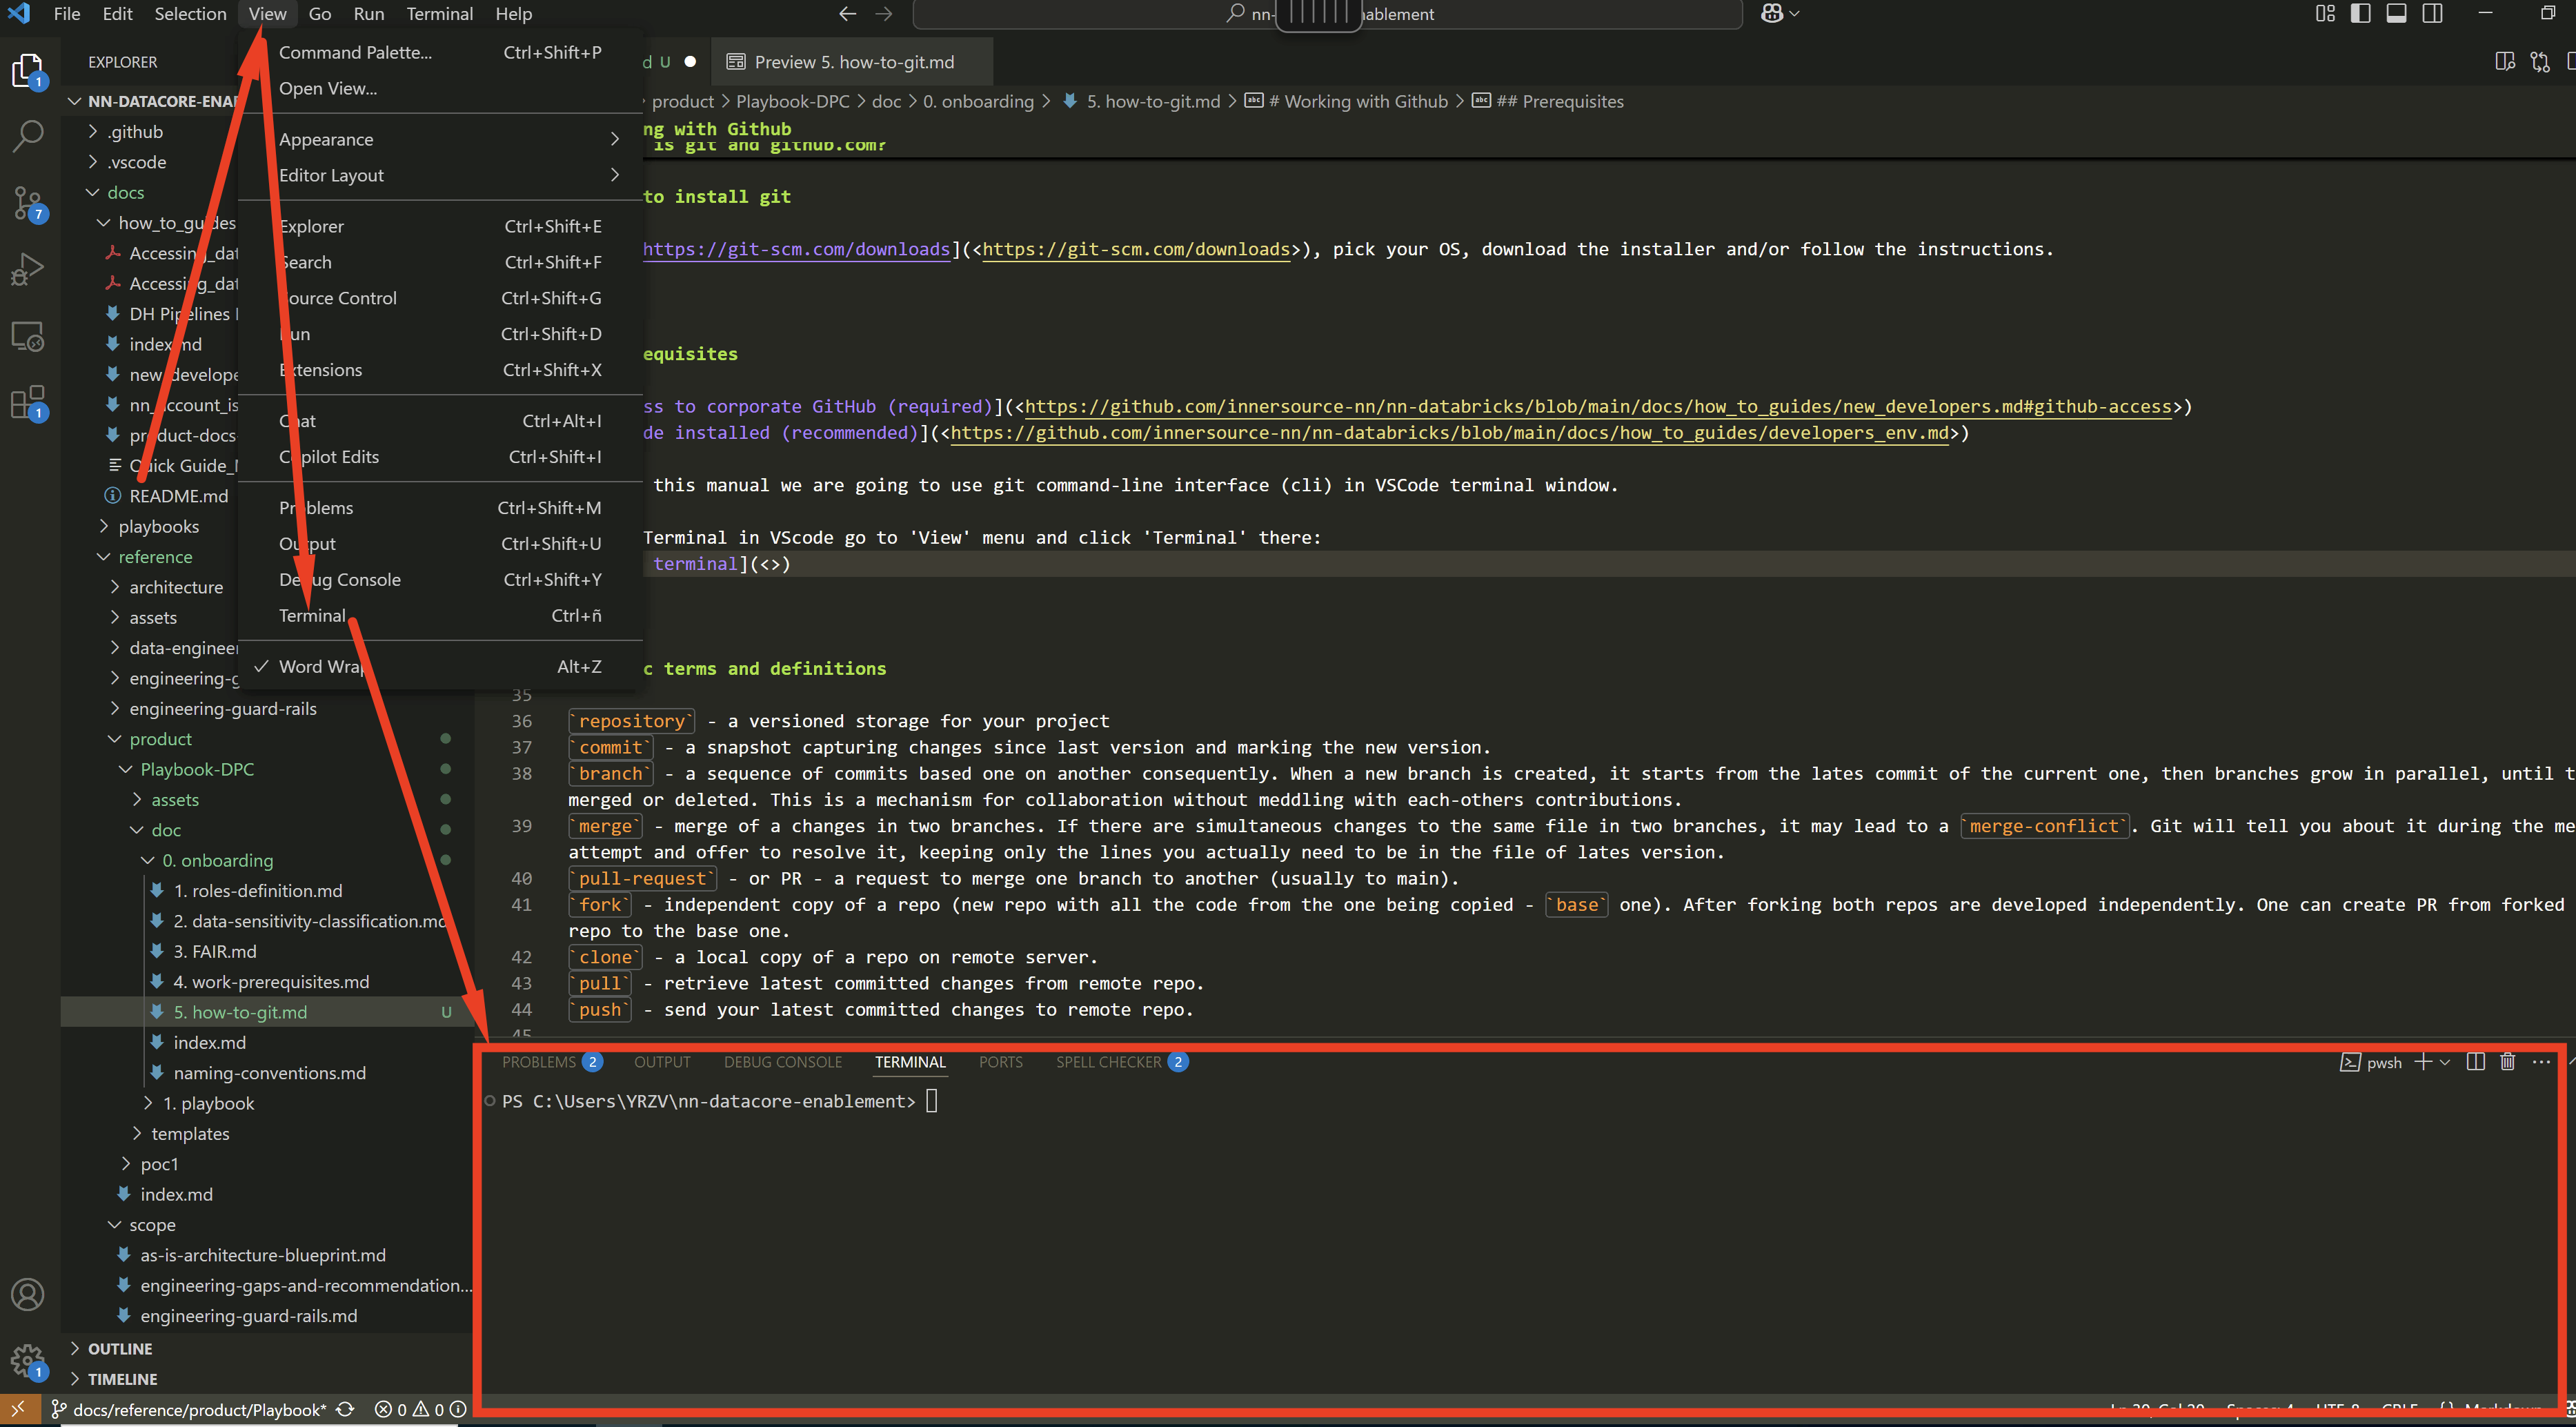
Throughout this manual, we will use the Git command-line interface (CLI). You can execute Git CLI commands using Windows PowerShell or the VSCode Terminal.
To open the terminal in VSCode, go to the 'View' menu and select 'Terminal'.
Basic terms and definitions#
repository– A versioned storage for your project.commit– A snapshot capturing changes since the last version and marking the new version. Commits are chained, allowing you to view or return to any previously committed version.branch– A sequence of commits built one after another. When a new branch is created, it starts from the latest commit of the current branch. Branches grow in parallel until they are merged or deleted, enabling collaboration without interfering with each other's contributions.merge– Combines changes from two branches. If simultaneous changes are made to the same file in both branches, amerge-conflictmay occur. Git alerts you during the merge attempt and allows you to resolve it by selecting the lines to include in the final version. Any branch can be merged into another branch, except itself.pull-request(PR) – A request to merge one branch into another (usually into themainbranch).fork– An independent copy of a repository. A fork creates a new repository containing all the code from the original (base) repository. After forking, both repositories evolve independently, but PRs can be created from a fork to the base repository.clone– A local copy of a remote repository.pull– A command, retrieves the latest committed changes from the remote repository.push– A command, sends your latest committed changes to the remote repository.
Creating a repo on github.com#
If you already have a repository to contribute to, skip to Cloning a Repository.
- Open your browser and go to GitHub.
-
On the top panel, click the
[+]button and selectNew repository:
Hold "Alt" / "Option" to enable Pan & Zoom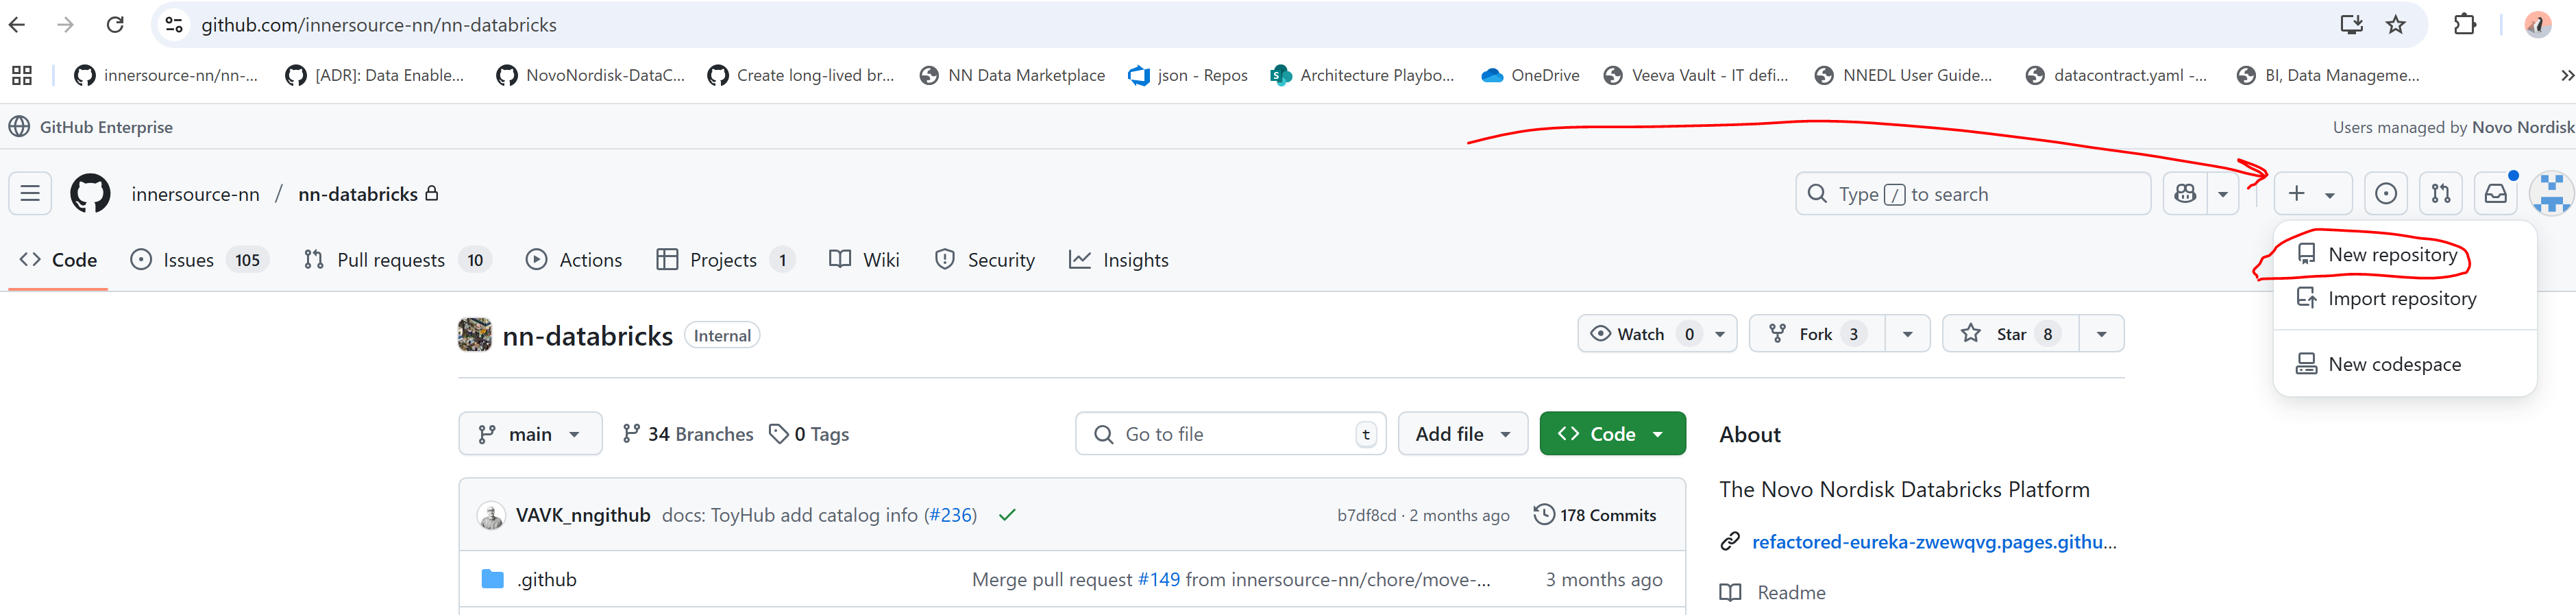
OR find and press theNew repositorybutton:
Hold "Alt" / "Option" to enable Pan & Zoom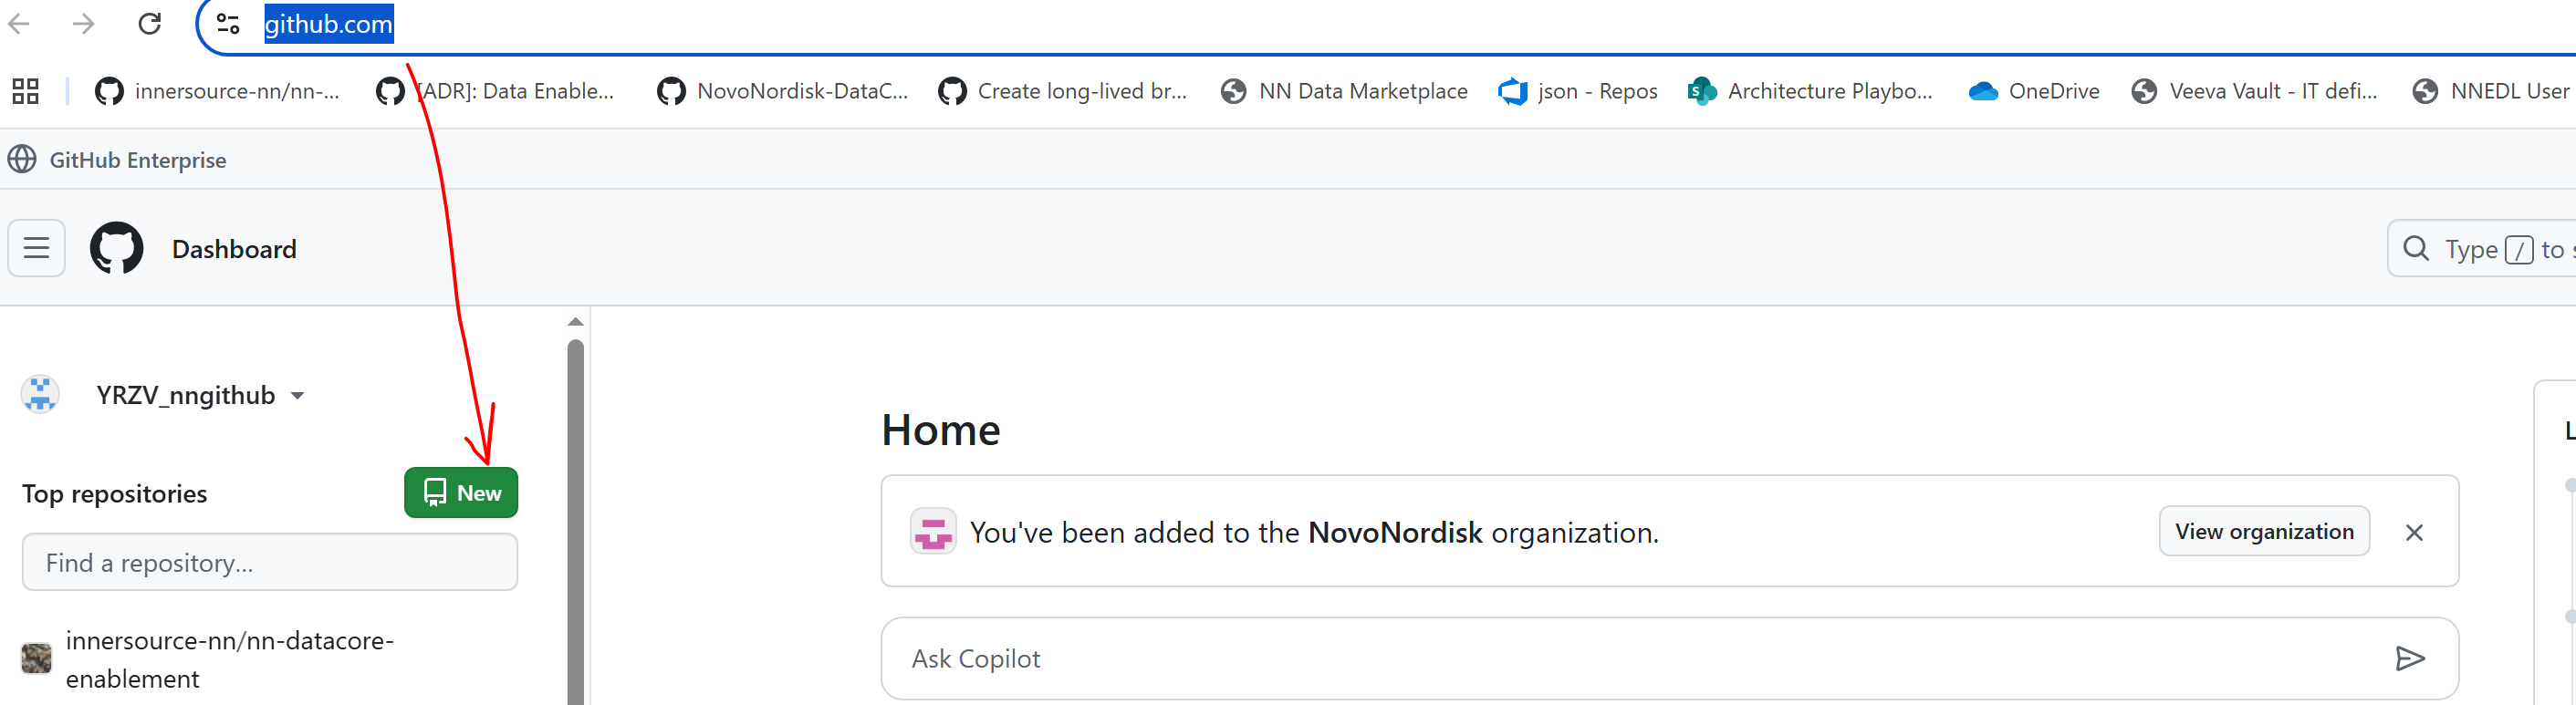
-
Fill out the form:
- The name field is required; everything else can be added later.
- Specify a name and press
Create repository:
Hold "Alt" / "Option" to enable Pan & Zoom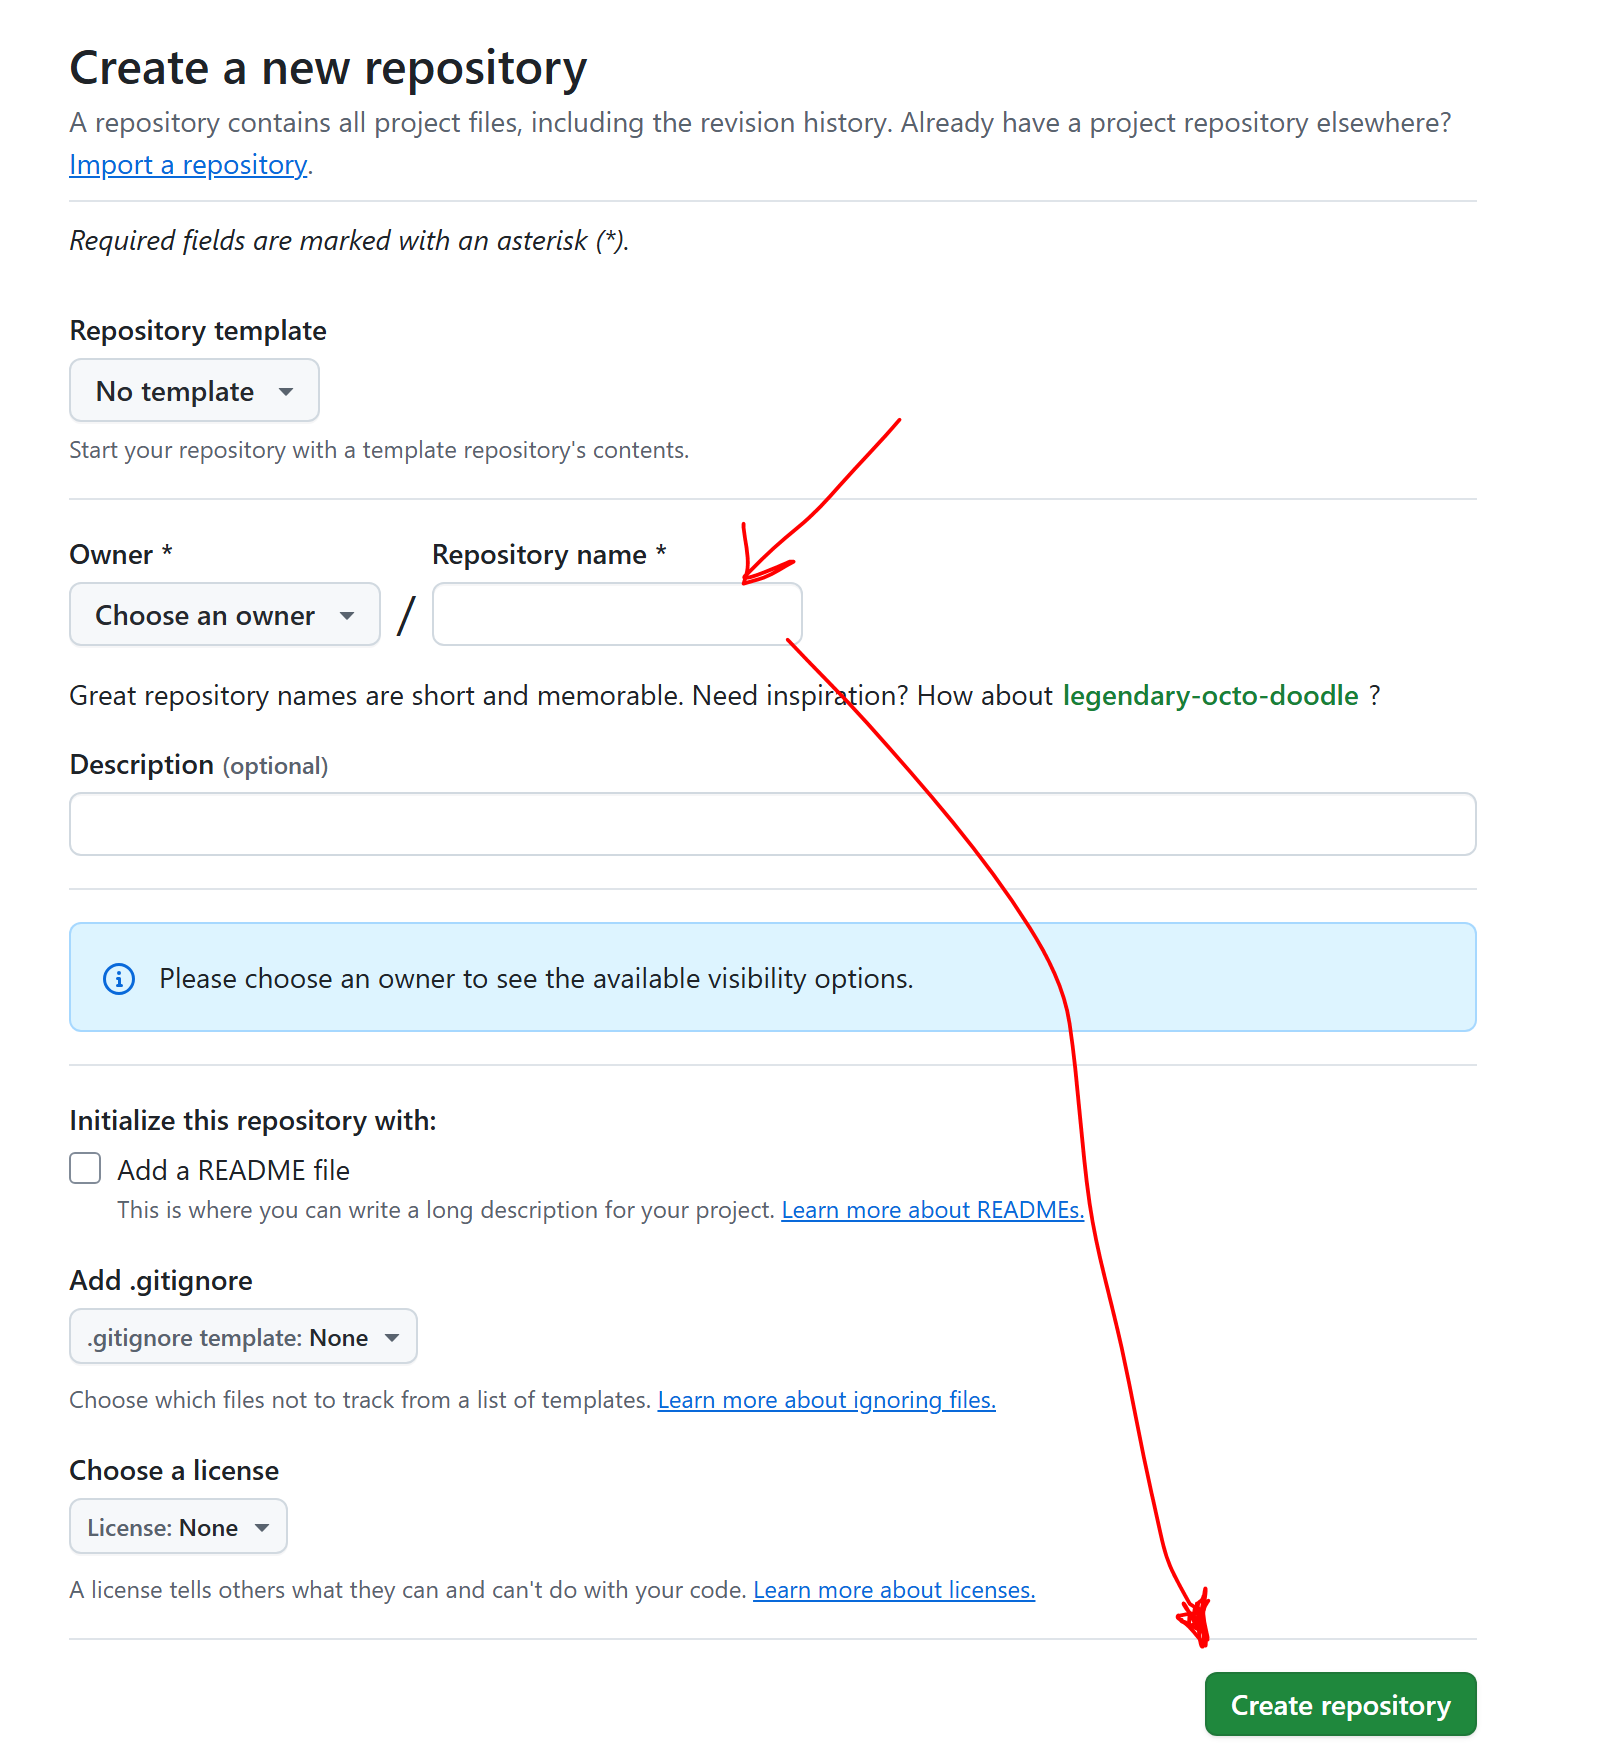
Congratulations! You now have a repository. You can clone it to your machine and start contributing!
Cloning a repo#
TLDR: git clone https://github.com/repo_owner/repo_name.git
To clone a repository, you need to know its URL. Follow these steps if you're unsure how to find your repository on GitHub:
- Go to GitHub.
-
Click your user icon:
Hold "Alt" / "Option" to enable Pan & Zoom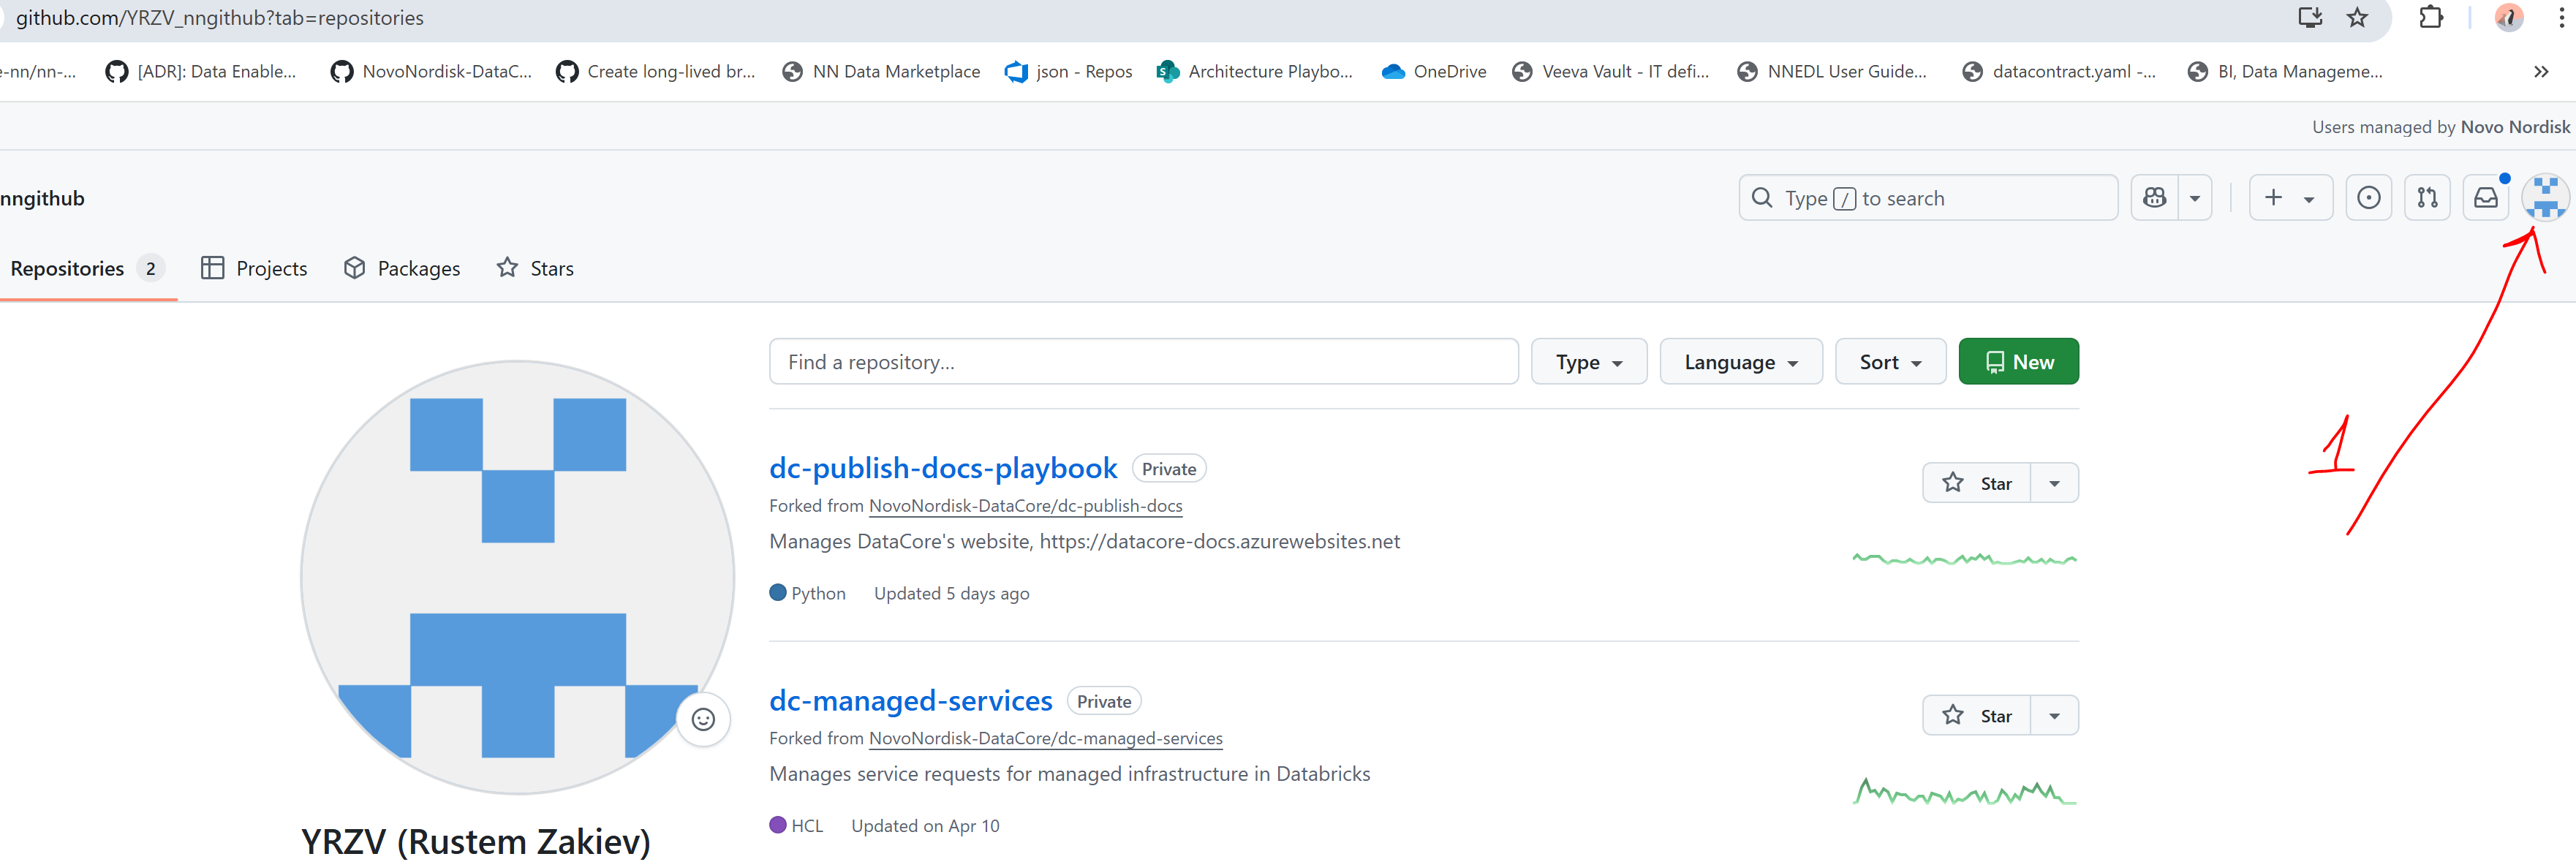
-
Click
Your repositoriesin the drop-down menu:
Hold "Alt" / "Option" to enable Pan & Zoom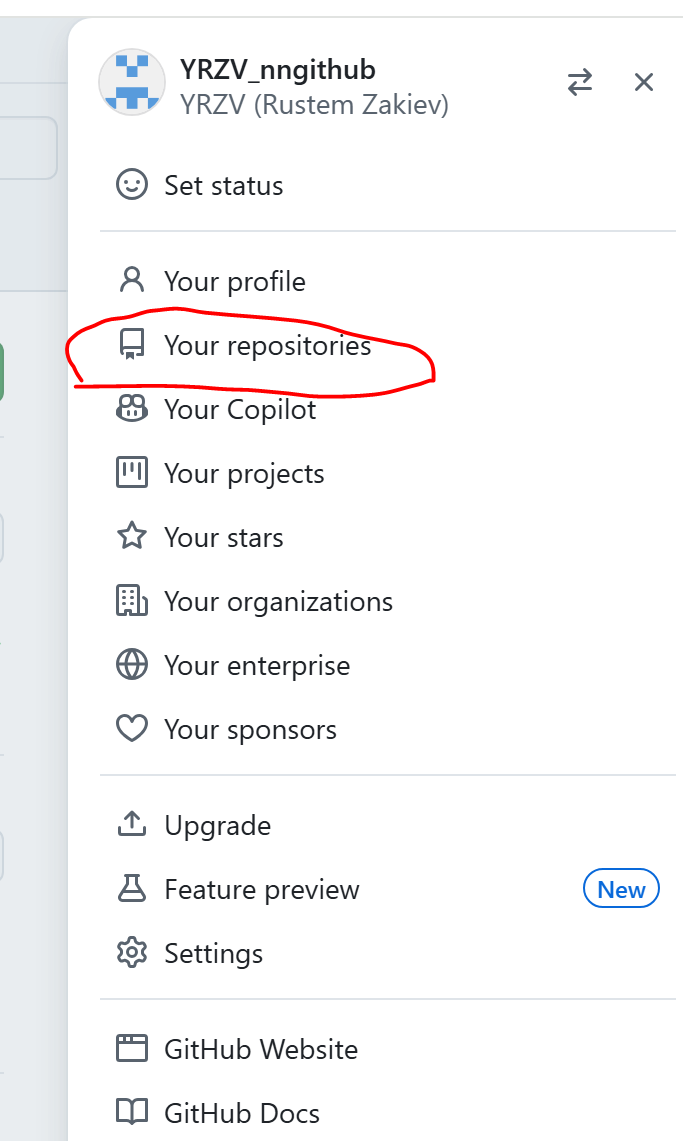
-
You'll see a list of all repositories you've created or are contributing to:
Hold "Alt" / "Option" to enable Pan & Zoom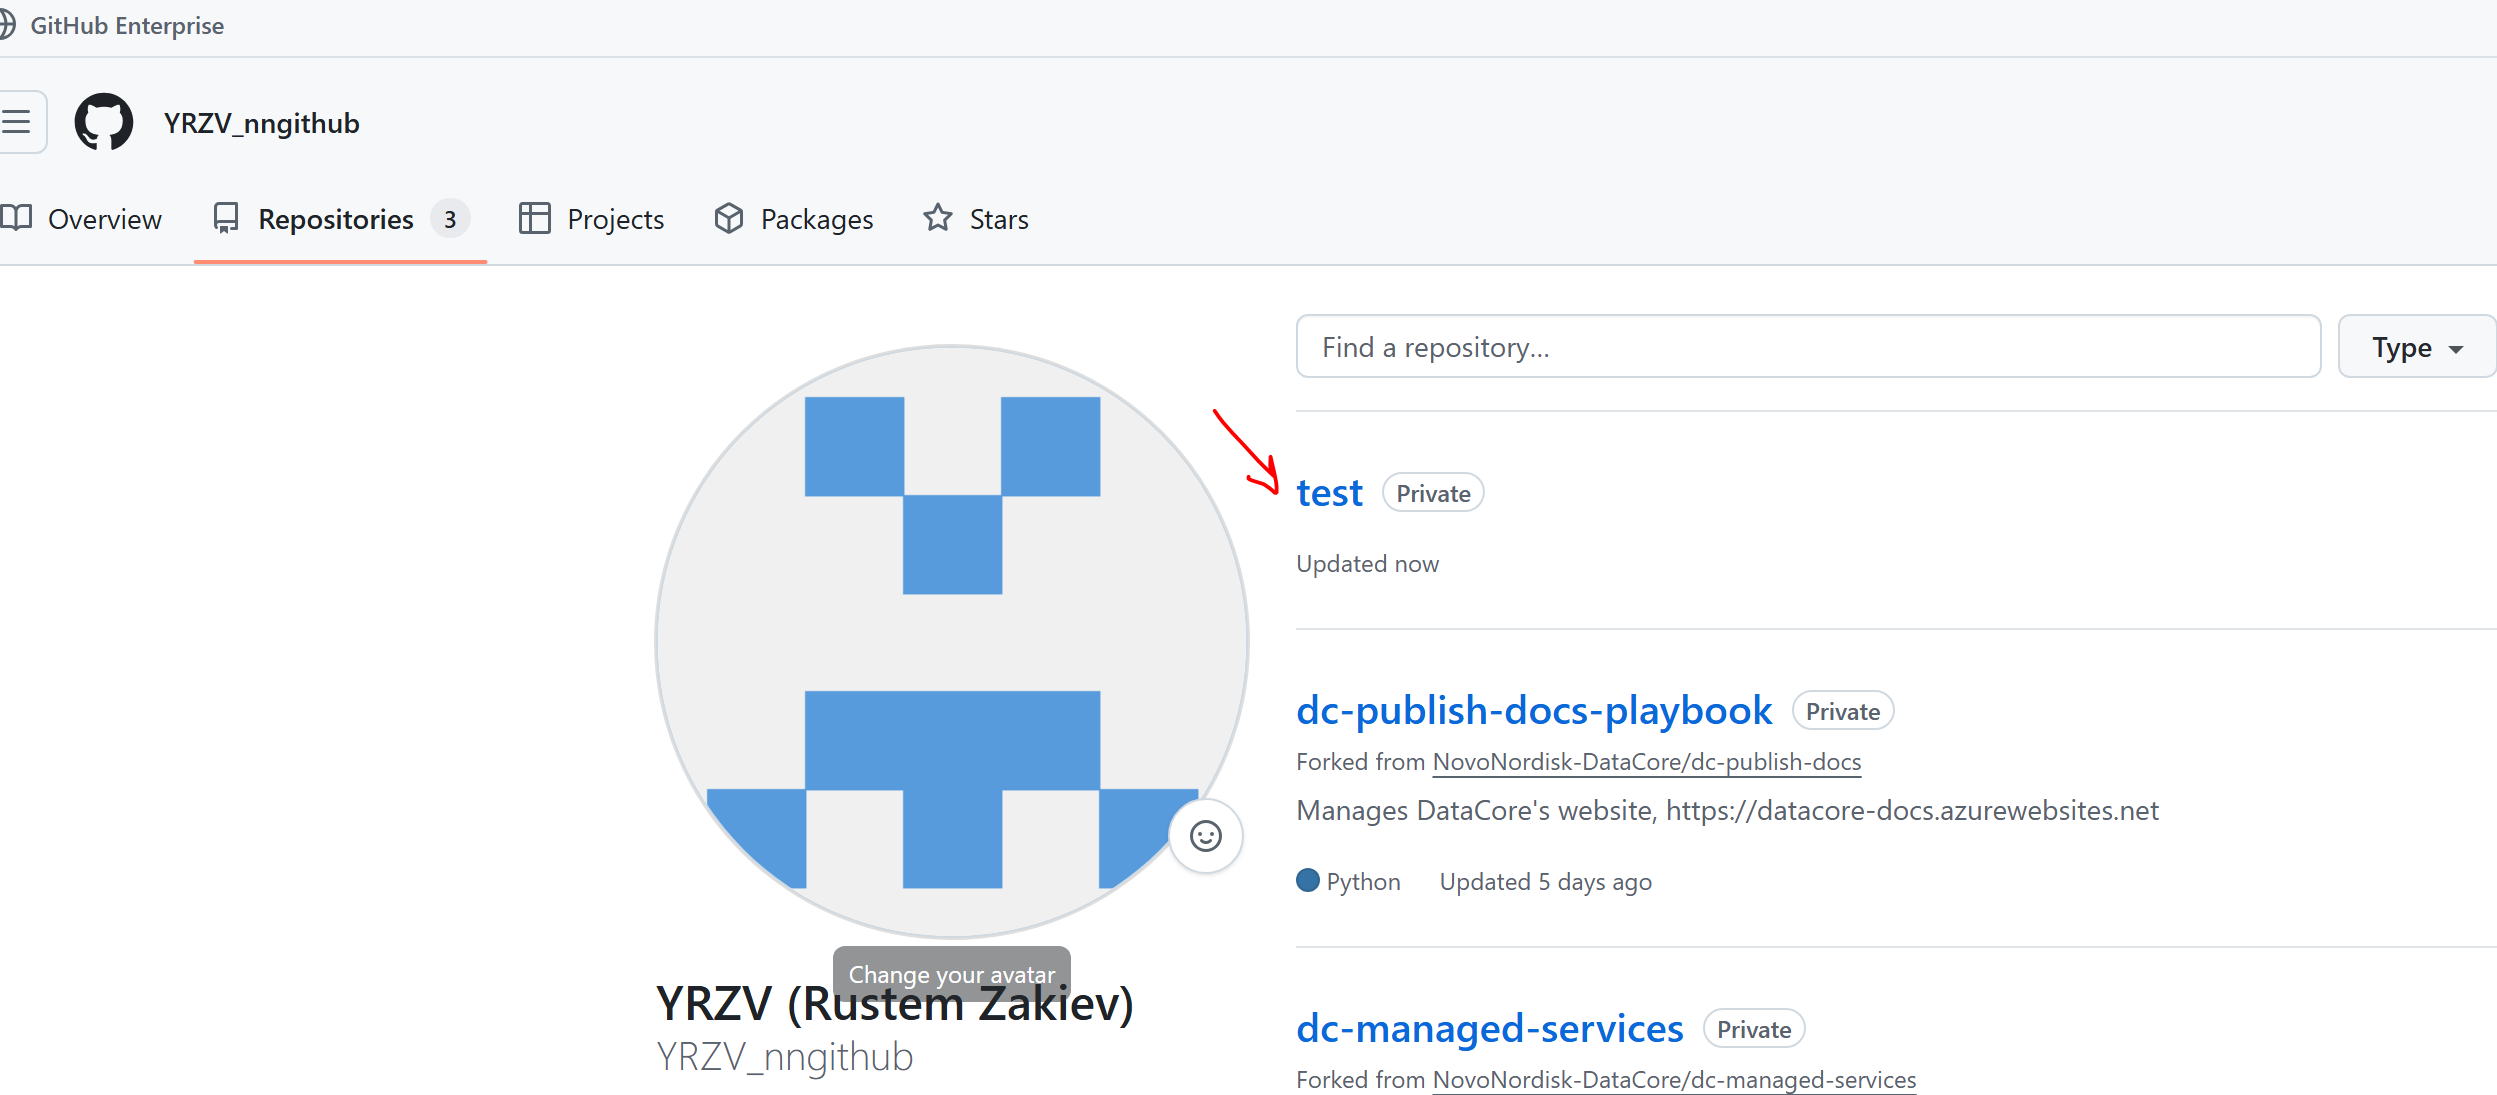
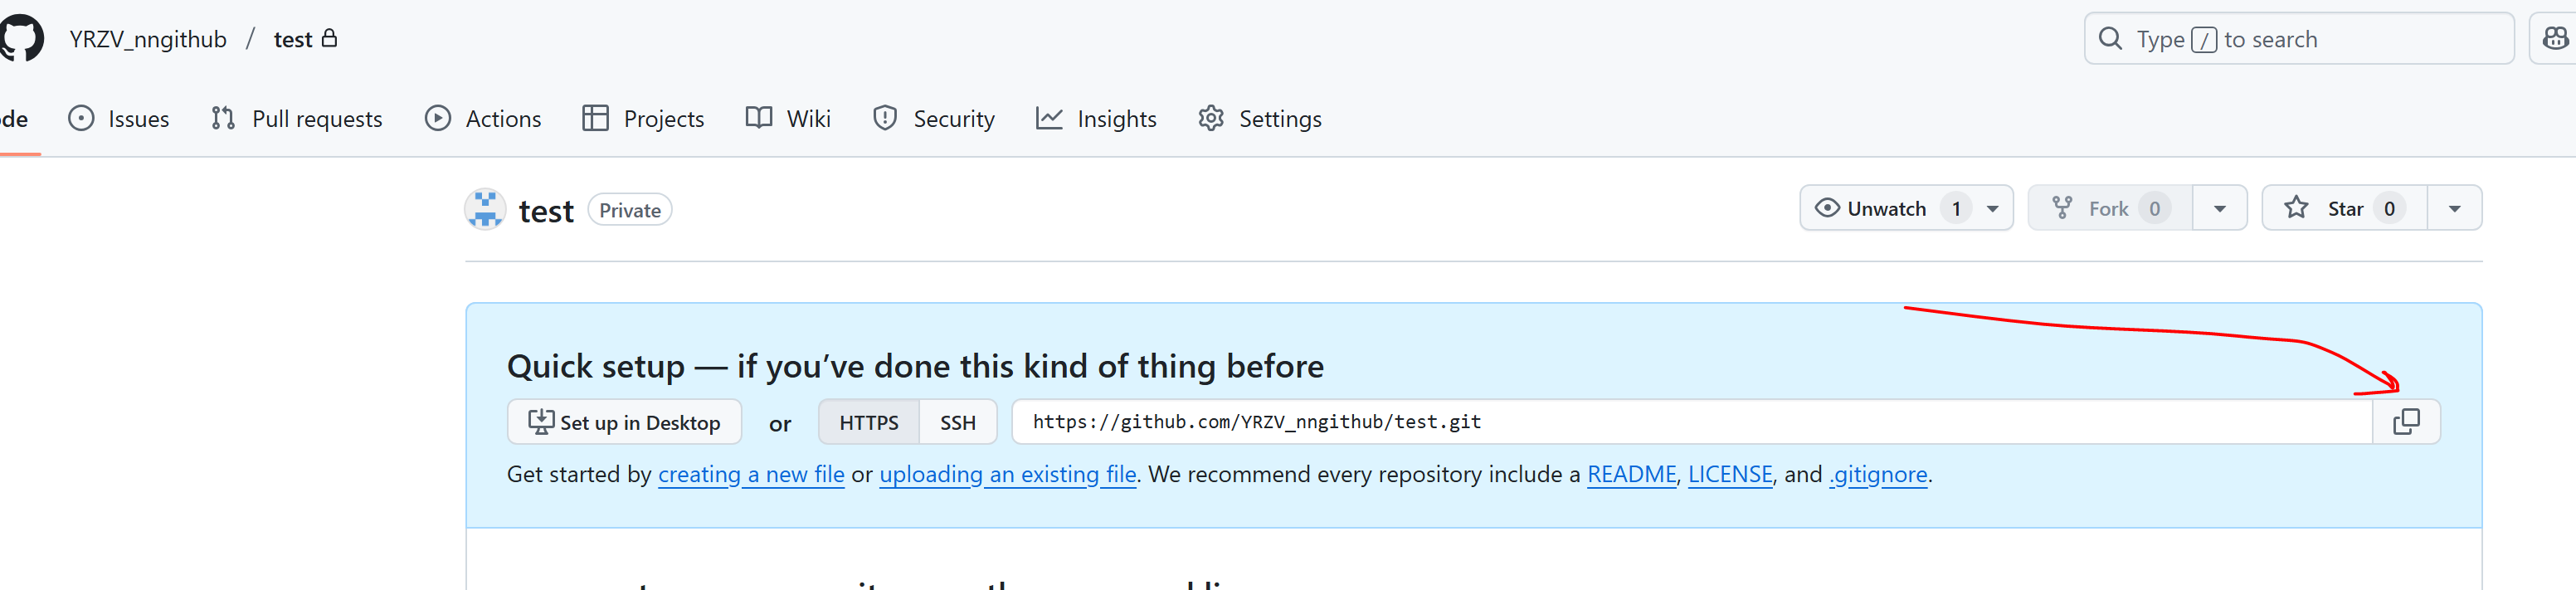
Copy the Repository URL:
GitHub provides a helper to copy the correct URL for cloning:
1. Navigate to the repository in GitHub using your browser.
2. Press the Code button and copy the provided URL:
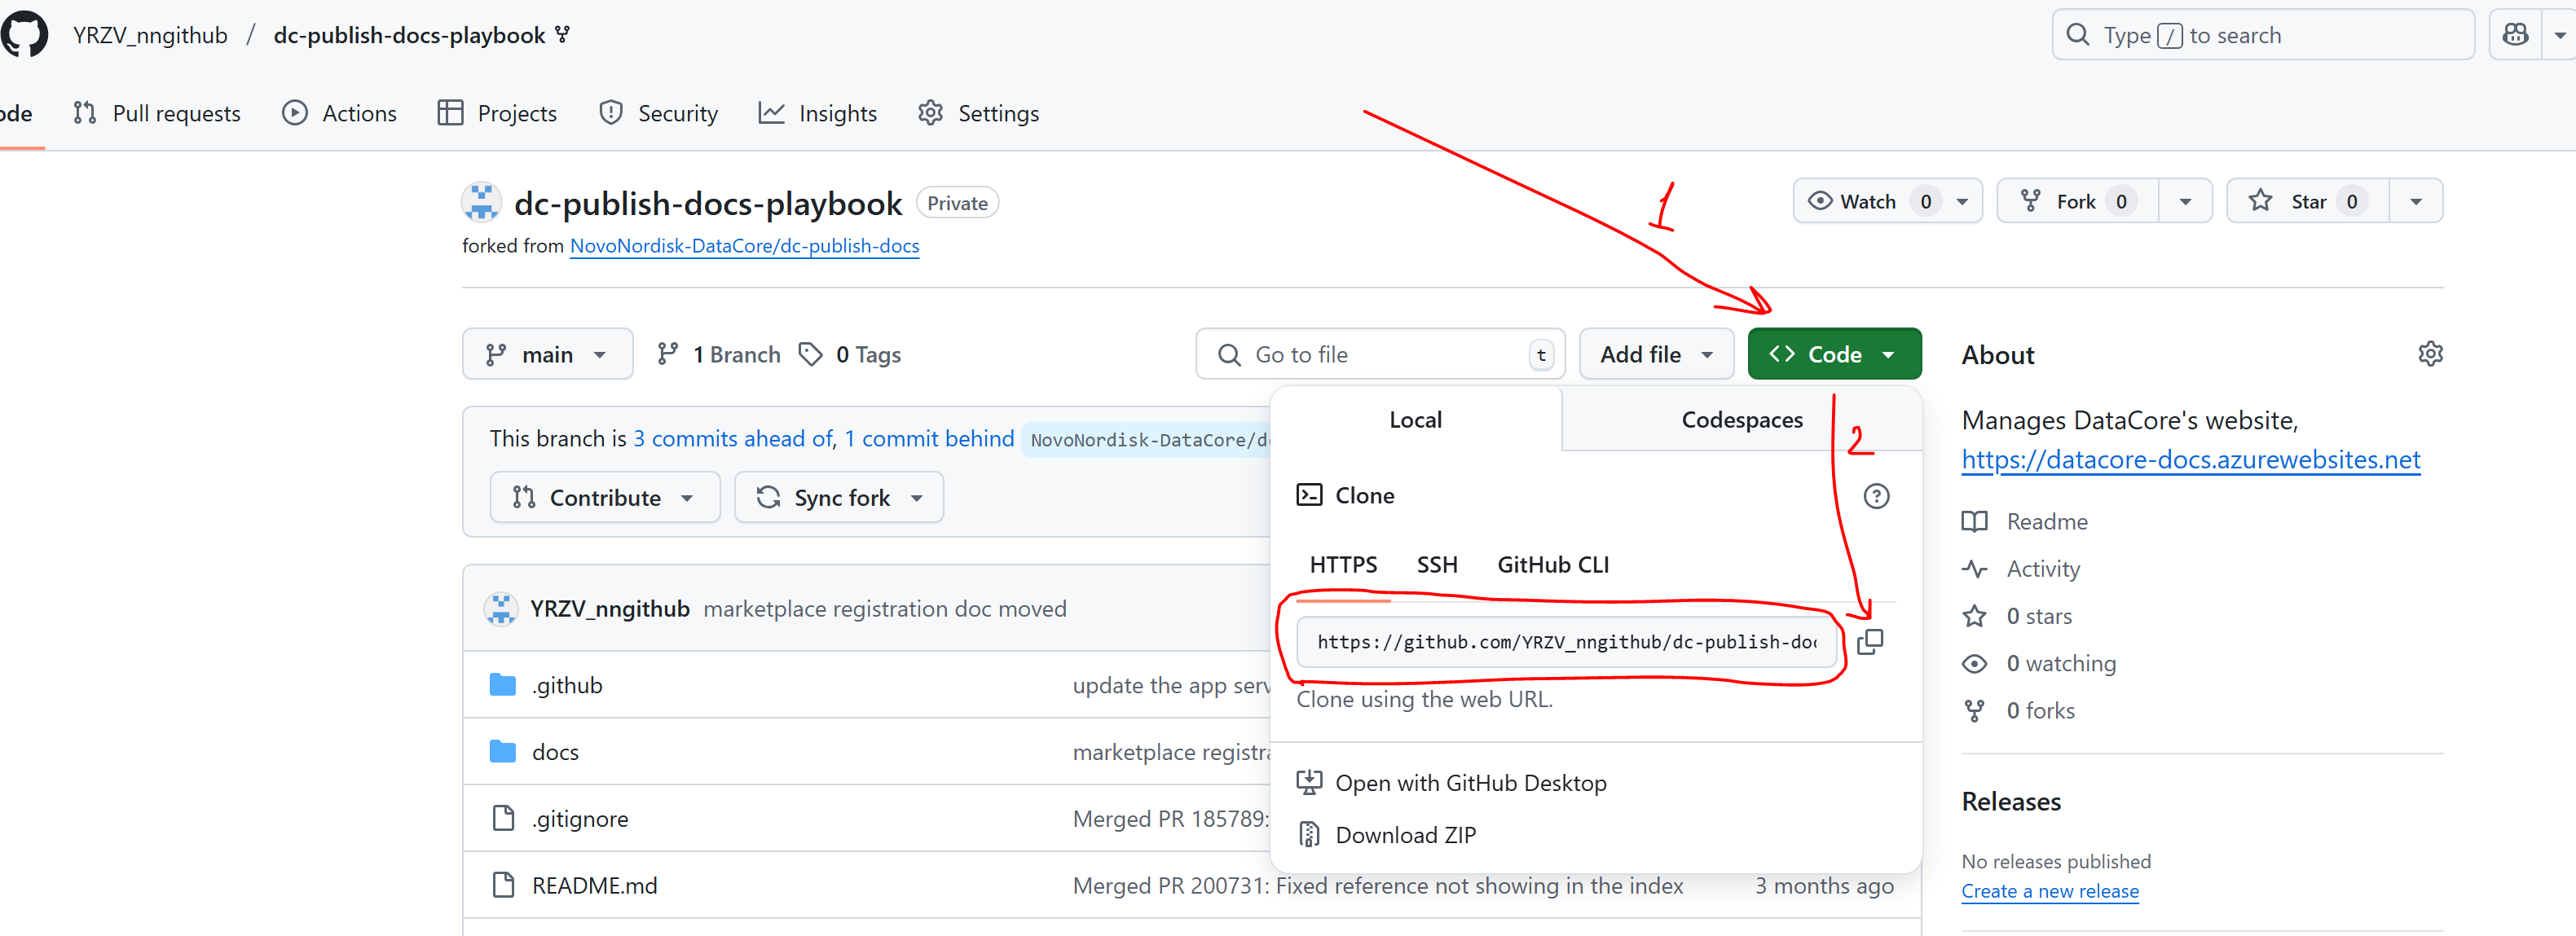
For newly created repositories without commits, the URL is displayed directly on the repository page:
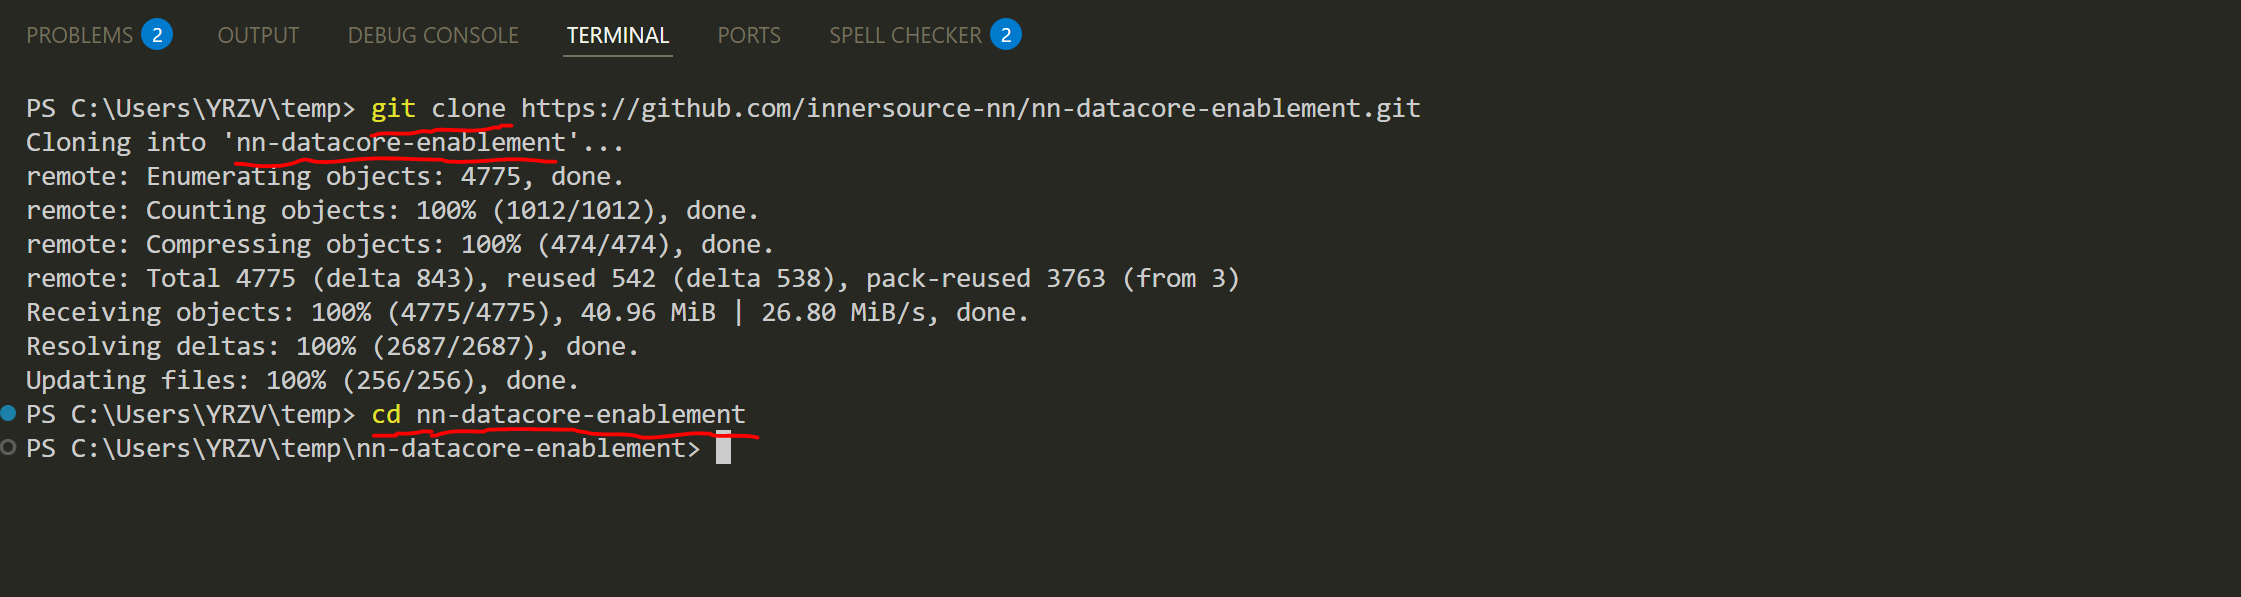
Clone the Repository:
Having the repository URL, open a terminal and run:
git clone {url}
Git will create a directory with name of your repository. Change to that directory (cd {dir_name}) and you're all set to start contributing.
Branching#
Danger
As a rule of thumb - NEVER push to main branch unless explicitly agreed within the project team.
commit– A snapshot capturing changes since the last version and marking the new version. Commits are chained, allowing you to view or return to any previously committed version.branch– A sequence of commits built one after another. When a new branch is created, it starts from the latest commit of the current branch.

On the diagram above, the "tree" grows from bottom to top. A new branch was created from the second commit of main. Independent commits were then added to both branches, and the new branch was eventually merged back into main.
For the second branch, there are two options after the merge:
1. Delete the branch, as it is no longer needed.
2. Keep the branch to continue working. If kept, additional changes can later be merged into main if necessary.
To create a new branch in your local repository, ensure you're in the repository's directory and run the following command: git branch {name-of-your-branch}
This will create a new branch from the branch you are currently on (that is not necessarily main).
To start working in your new branch (or switch to any other branch), use checkout command: git checkout {name-of-your-branch}
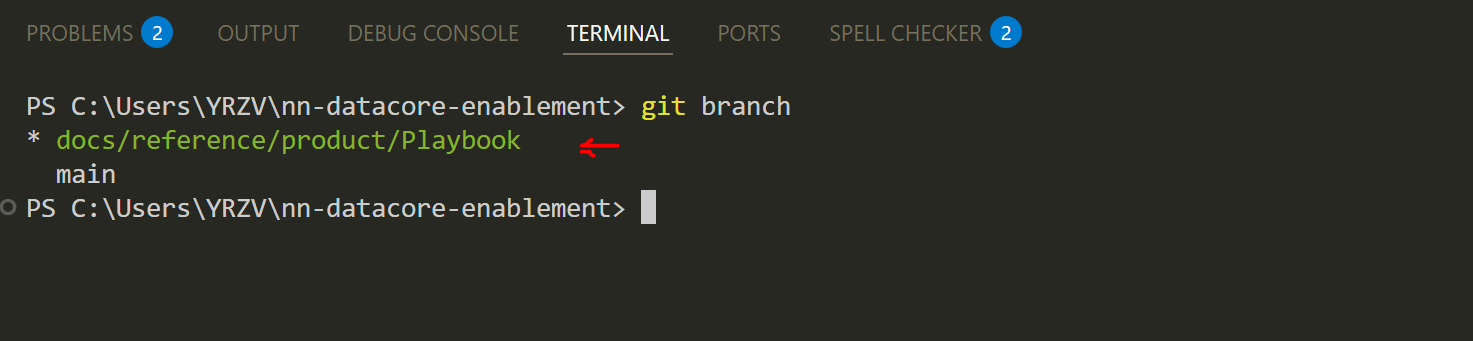
To see which branch you are currently on, just run git branch:
You can also work with branches that already exist in the remote repo - they do not get cloned by default.
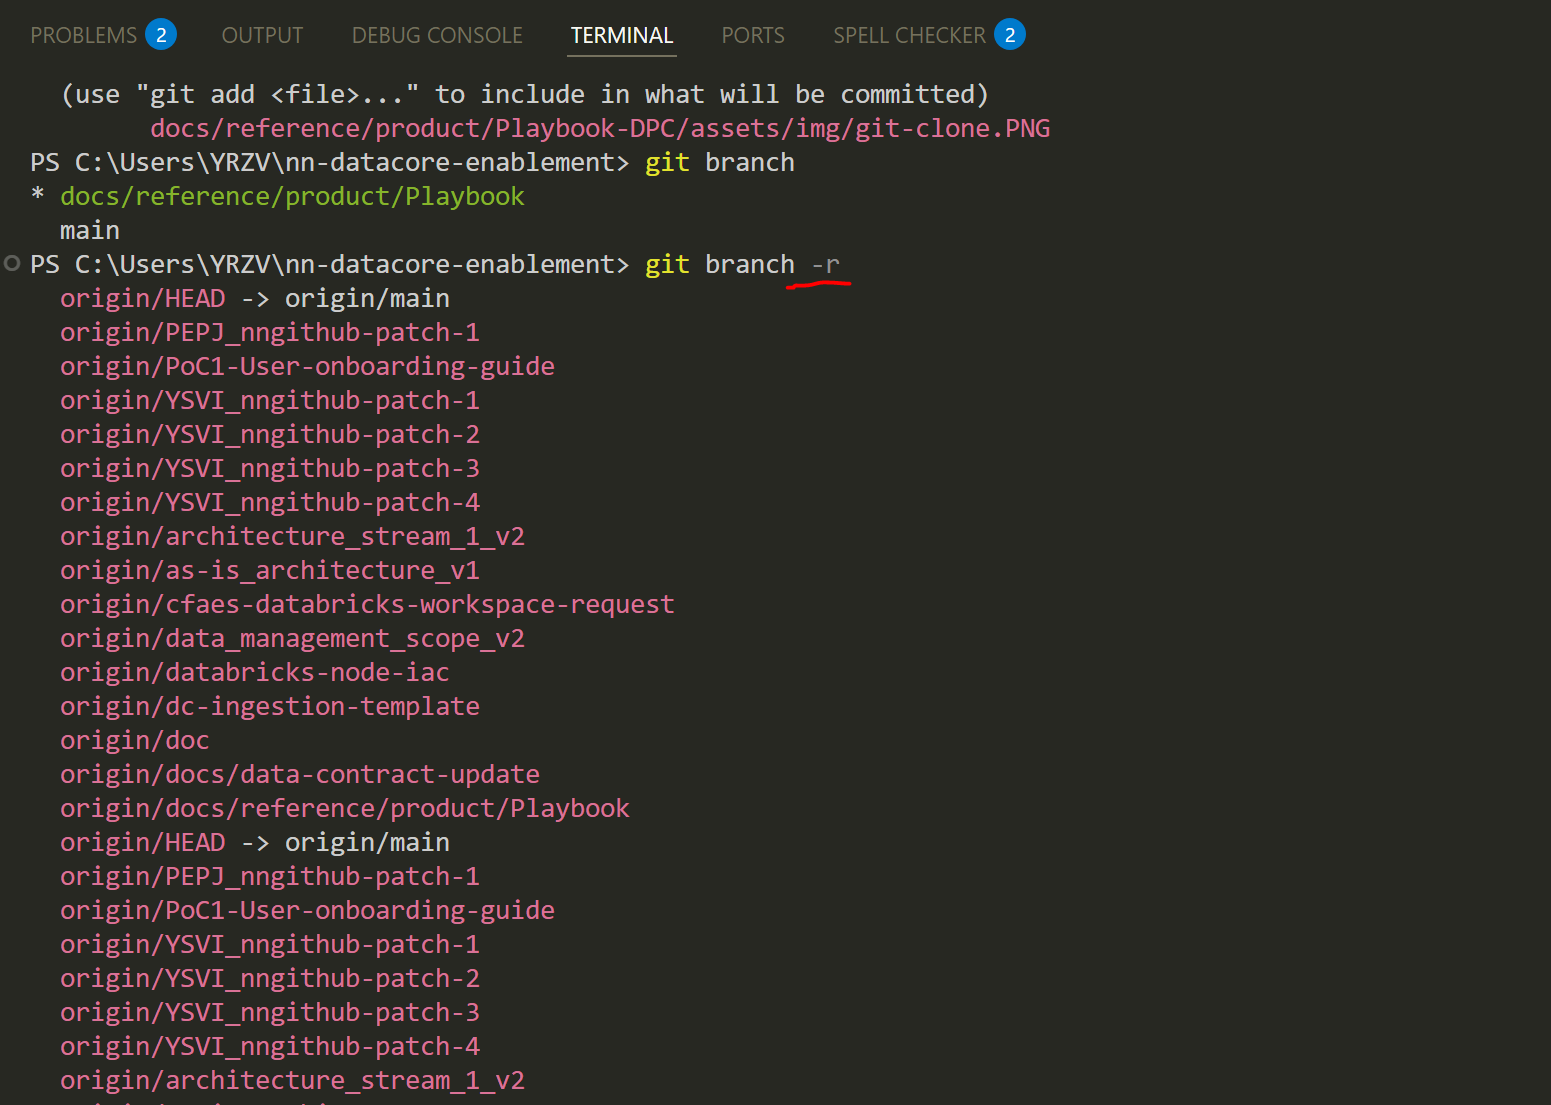
To see which branches are there, use the -r key: git branch -r - it will list you remote branches (if a list is long you might need to press q to exit):
You can start working in any remote branch locally right away. First, fetch all the branch data - run git fetch.
Now, checkout to the desired branch as described above, but make sure to omit origin/ when using the branch name as a parameter in the git checkout command.
Getting latest changes from remote repo#
Navigate to the directory containing your project, checkout to the branch you want to update, and run: git pull.
When working continuously in your branch, you might want to keep it up to date with the main branch (or another parent branch).
To do this, you need to merge the latest changes from main into your branch:
git checkout main
git pull
git checkout my-branch
git merge main
Note
You cannot switch branches if the current branch has uncommitted changes.
Although it is possible to temporarily save changes using a stash (git stash) and retrieve them later (git stash pop), this approach is error-prone. Stashes can be easily forgotten or applied to the wrong branch, leading to confusion or mistakes.
The recommended best practice is to commit all changes before switching branches to ensure a smooth and error-free workflow.
Changes, Commits and Pushes to remote#
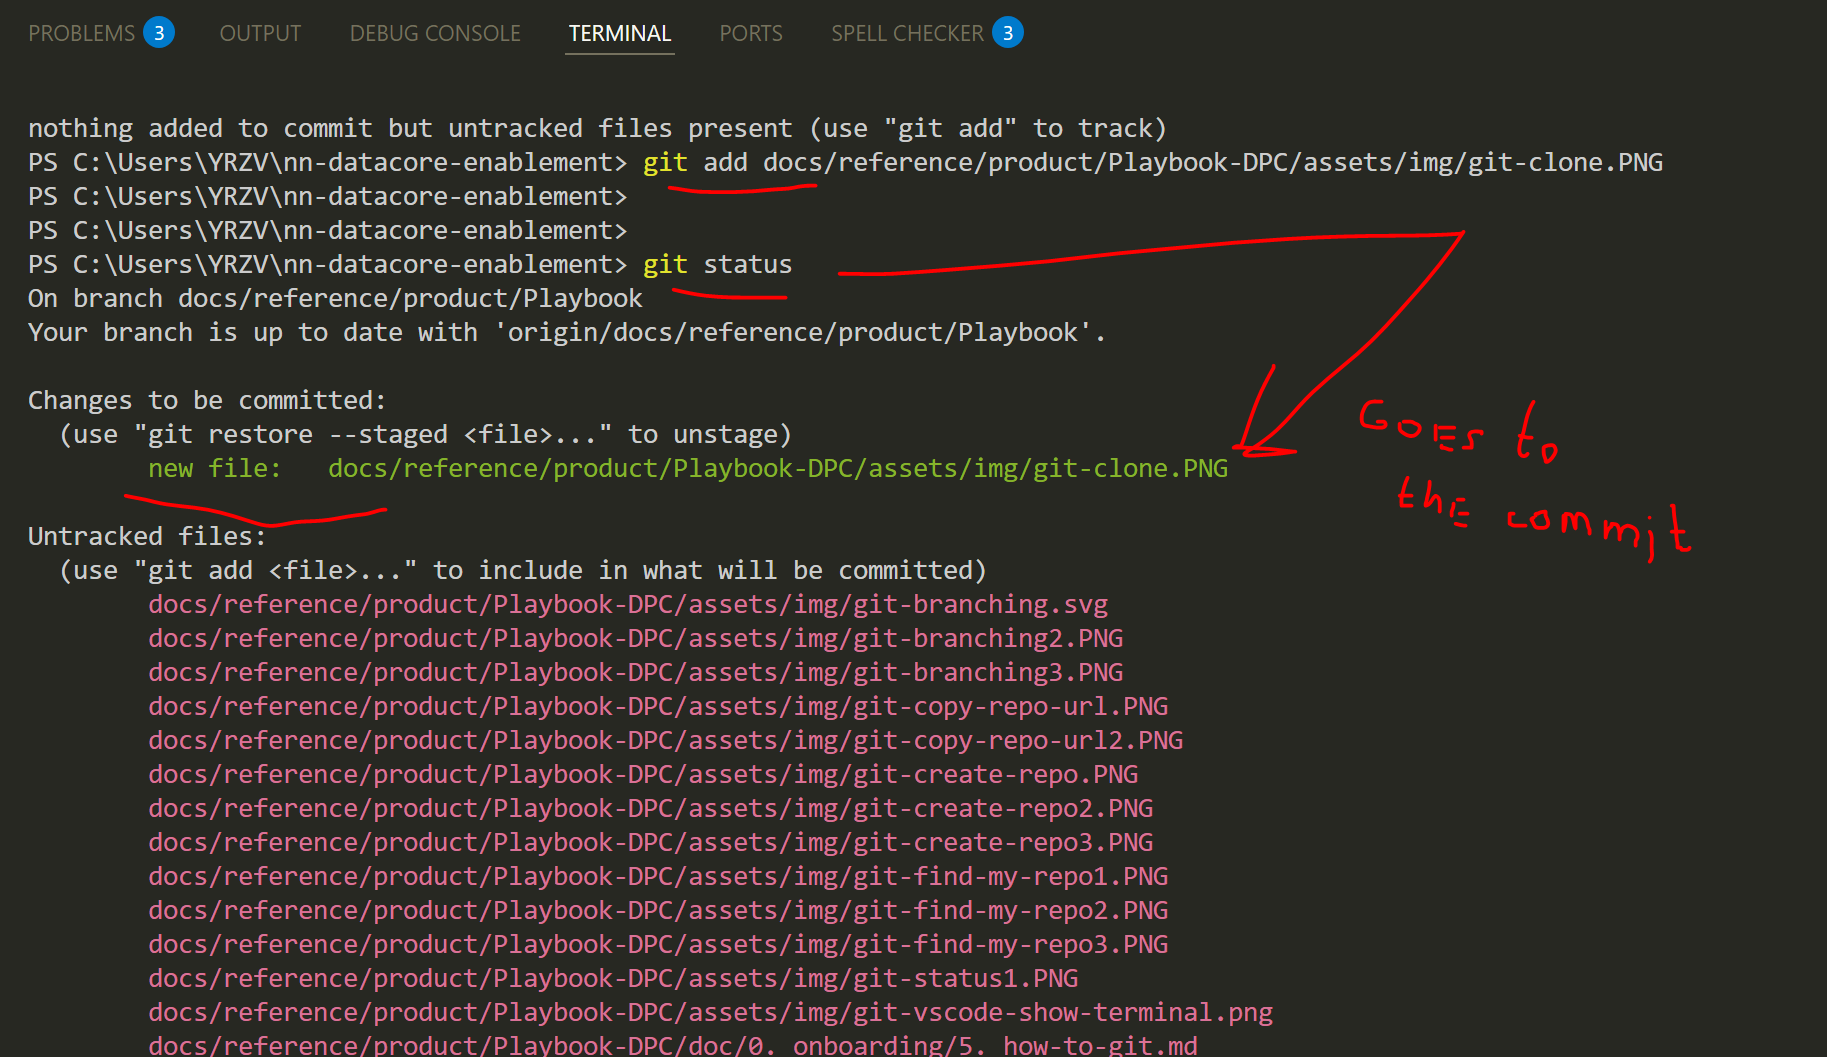
To check for any changes since the last commit in the current branch, use the git status command.

Committing changes to the project involves two steps:
1. Staging your changes
2. Committing the staged changes
Only staged changes are included in a commit, allowing you to stage specific files while continuing to work on others. This gives you the flexibility to split changes into separate commits as needed.
Adding Files to Staging#
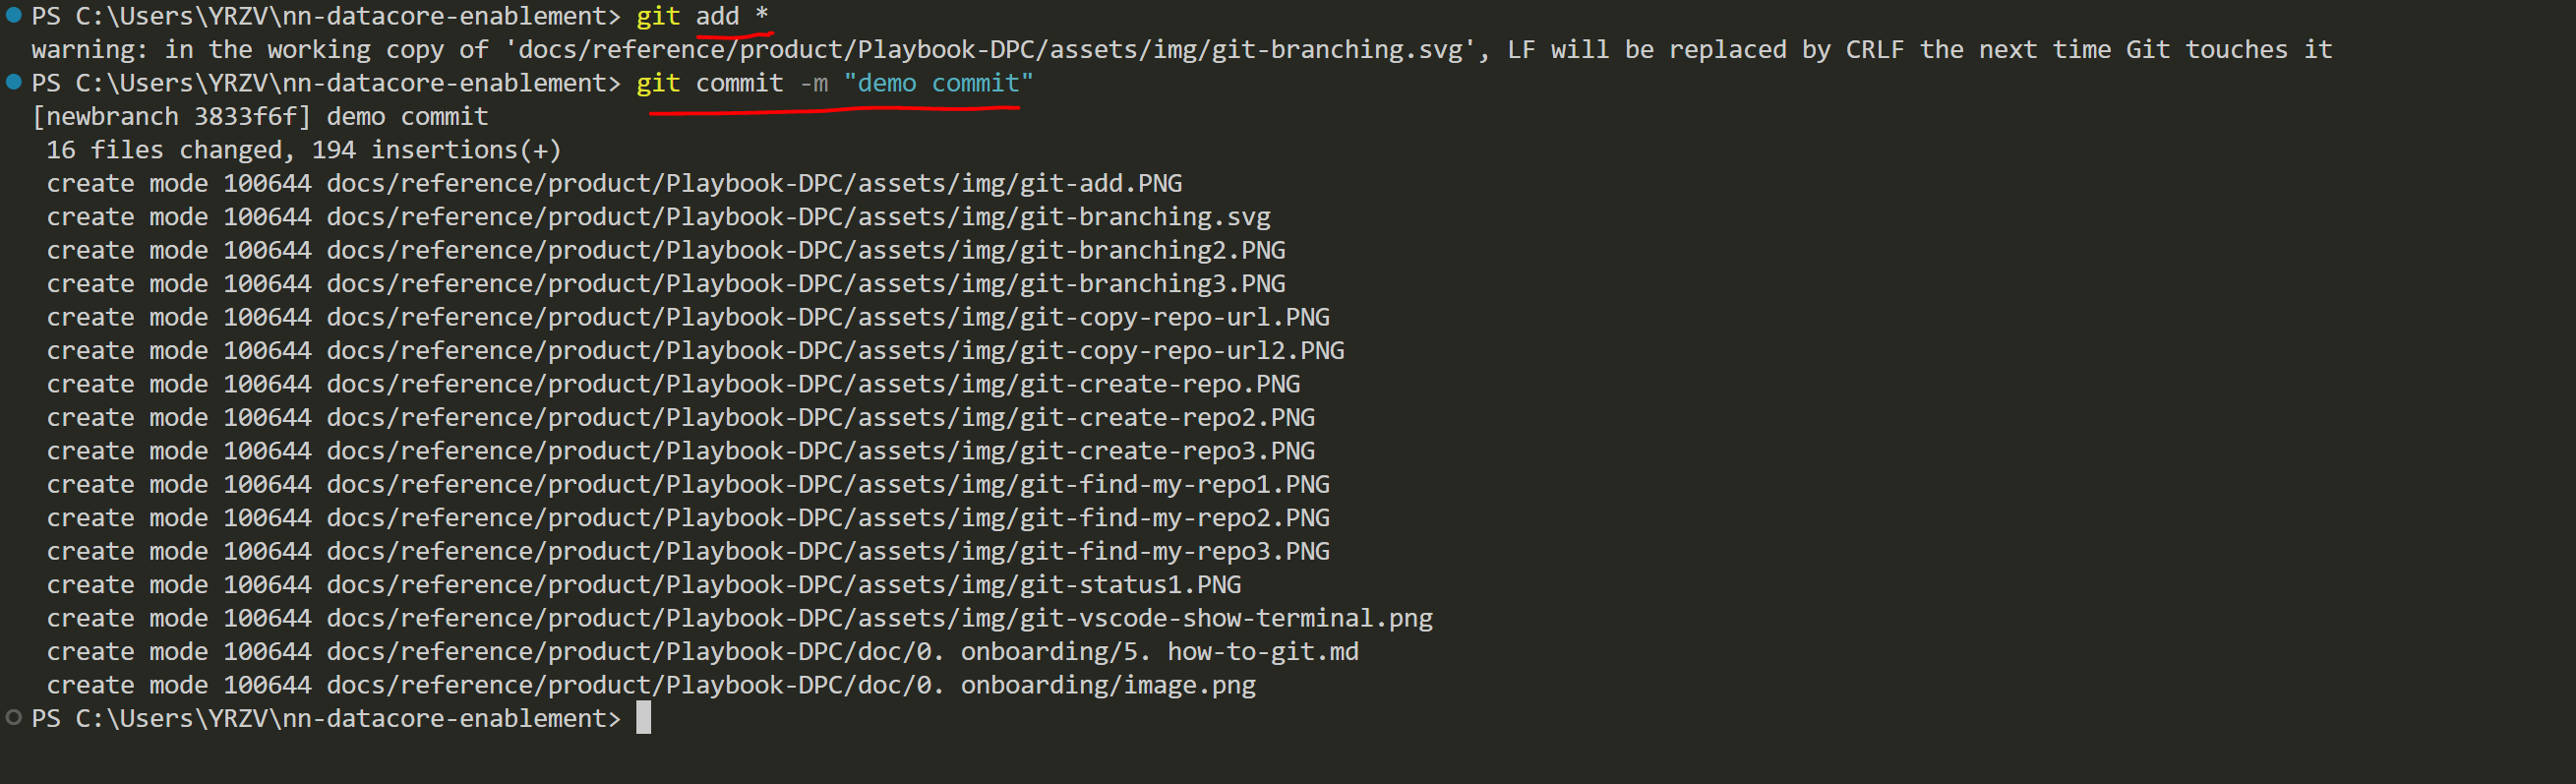
To stage all changed files, execute the following command in the root directory of your local repository:
git add *
Alternatively, you can stage specific files by specifying their paths instead of *.
Committing Changes#
While it's technically possible to commit after every smallest change, doing so complicates version tracking, reviewing, and collaboration. On the other hand, committing excessively large chunks of changes isn't ideal either - asking colleagues to review a pull request with 12,000 lines of code can lead to reluctance and resistance.
The balance lies in using common sense: commit changes in manageable chunks—small enough to be reviewed efficiently, yet substantial enough to represent meaningful progress.
Once the necessary files are staged, execute:
git commit -m "meaningful comment to the commit"
Keep your commit messages meaningful and clear. You'll appreciate this later when you need to investigate the project's history.
Now, it is time to push your changes to the remote server, making them available to your team and ready for merging into main.
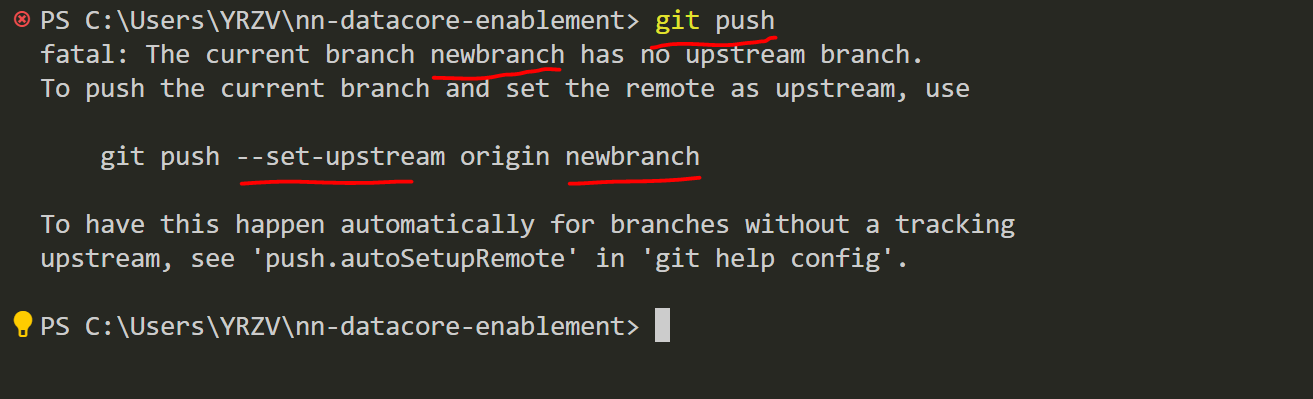
Pushing to Remote#
To push your changes, use the following command:
git push
Pushing a New Branch#
If the branch only exists locally and hasn't been pushed to the remote server yet, you'll need to extend the command:
git push --set-upstream {new branch name}
Don't worry - Git will display this instruction for you to copy and paste into the terminal.
Normally, when a push is done, you will receive a message confirming that your local and remote branches are up to date.
Creating a Pull Request (PR)#
- Open your browser and navigate to your repository on GitHub.
- Go to the "Pull requests" tab.
* Here, you'll see a list of open pull requests. -
Click the "New pull request" button to start creating your PR.
Hold "Alt" / "Option" to enable Pan & Zoom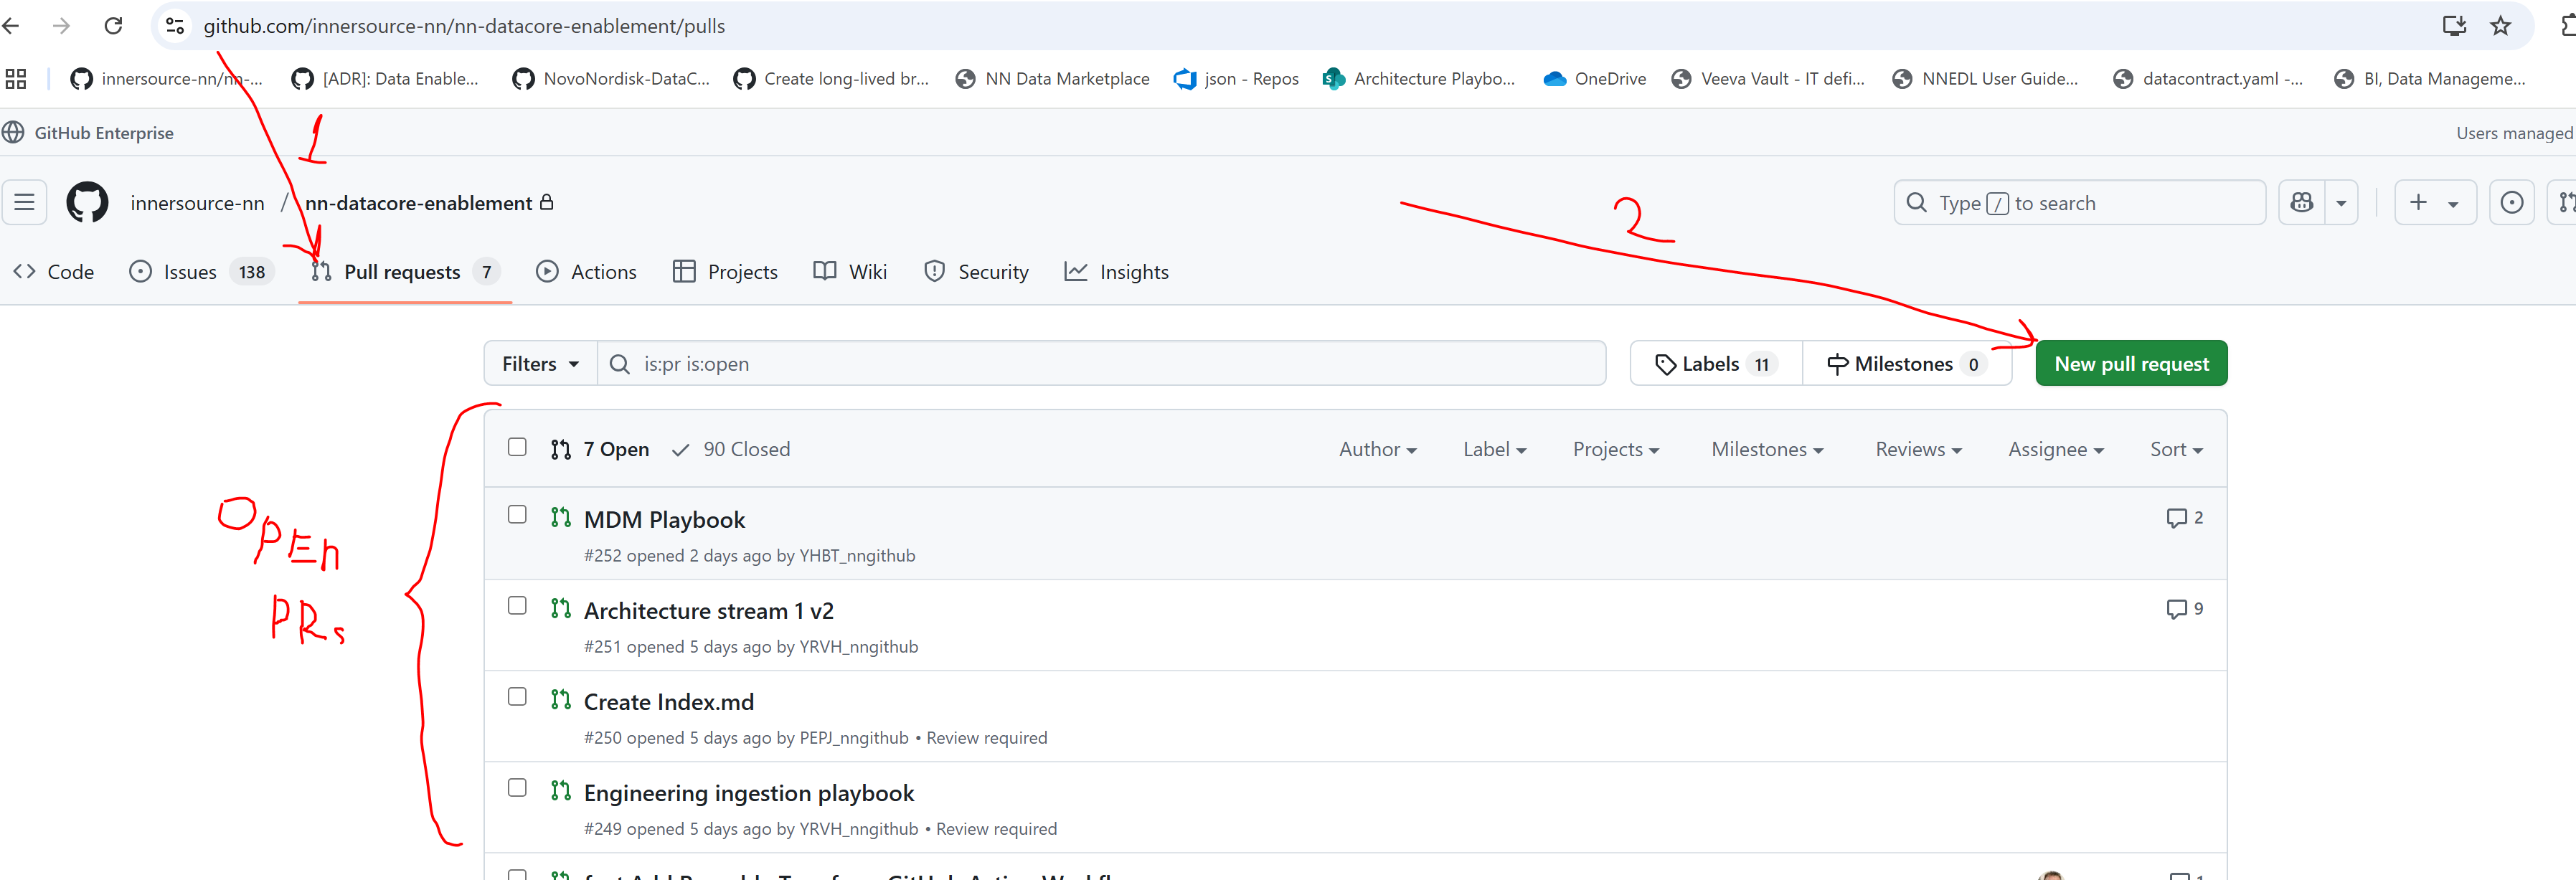
-
Specify the branches:
* Base branch – By default, this is usually set tomain(the branch you want to merge into).
* Compare branch – The branch containing your changes that you want to merge into the base branch.
Hold "Alt" / "Option" to enable Pan & Zoom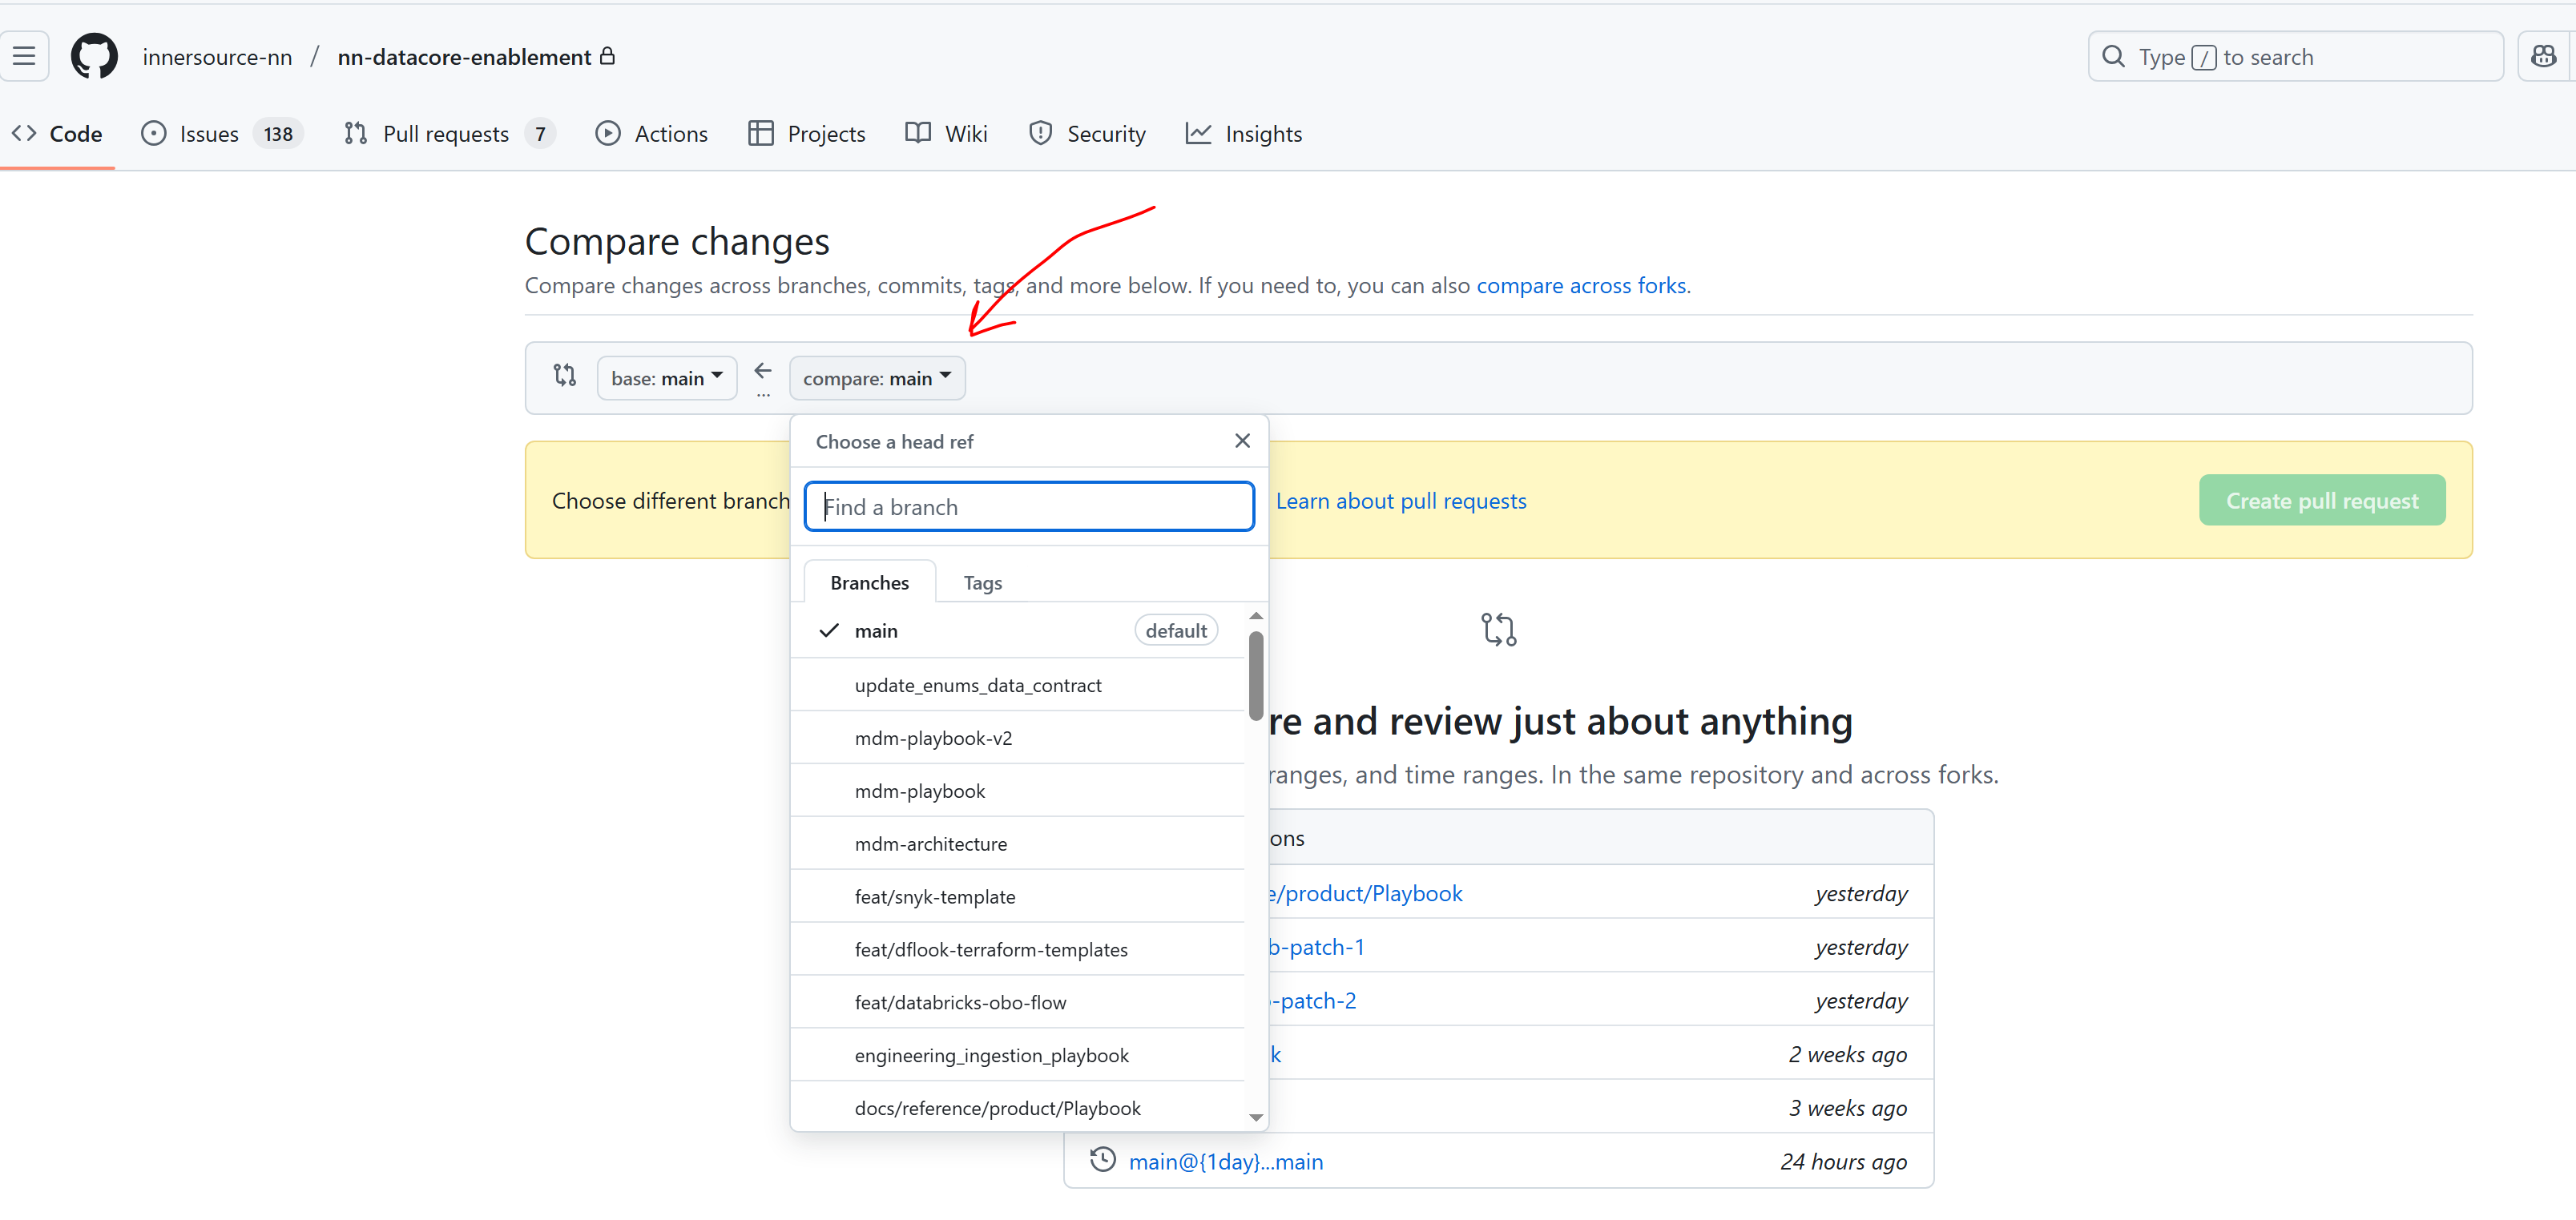
-
Press "Create pull request":
Hold "Alt" / "Option" to enable Pan & Zoom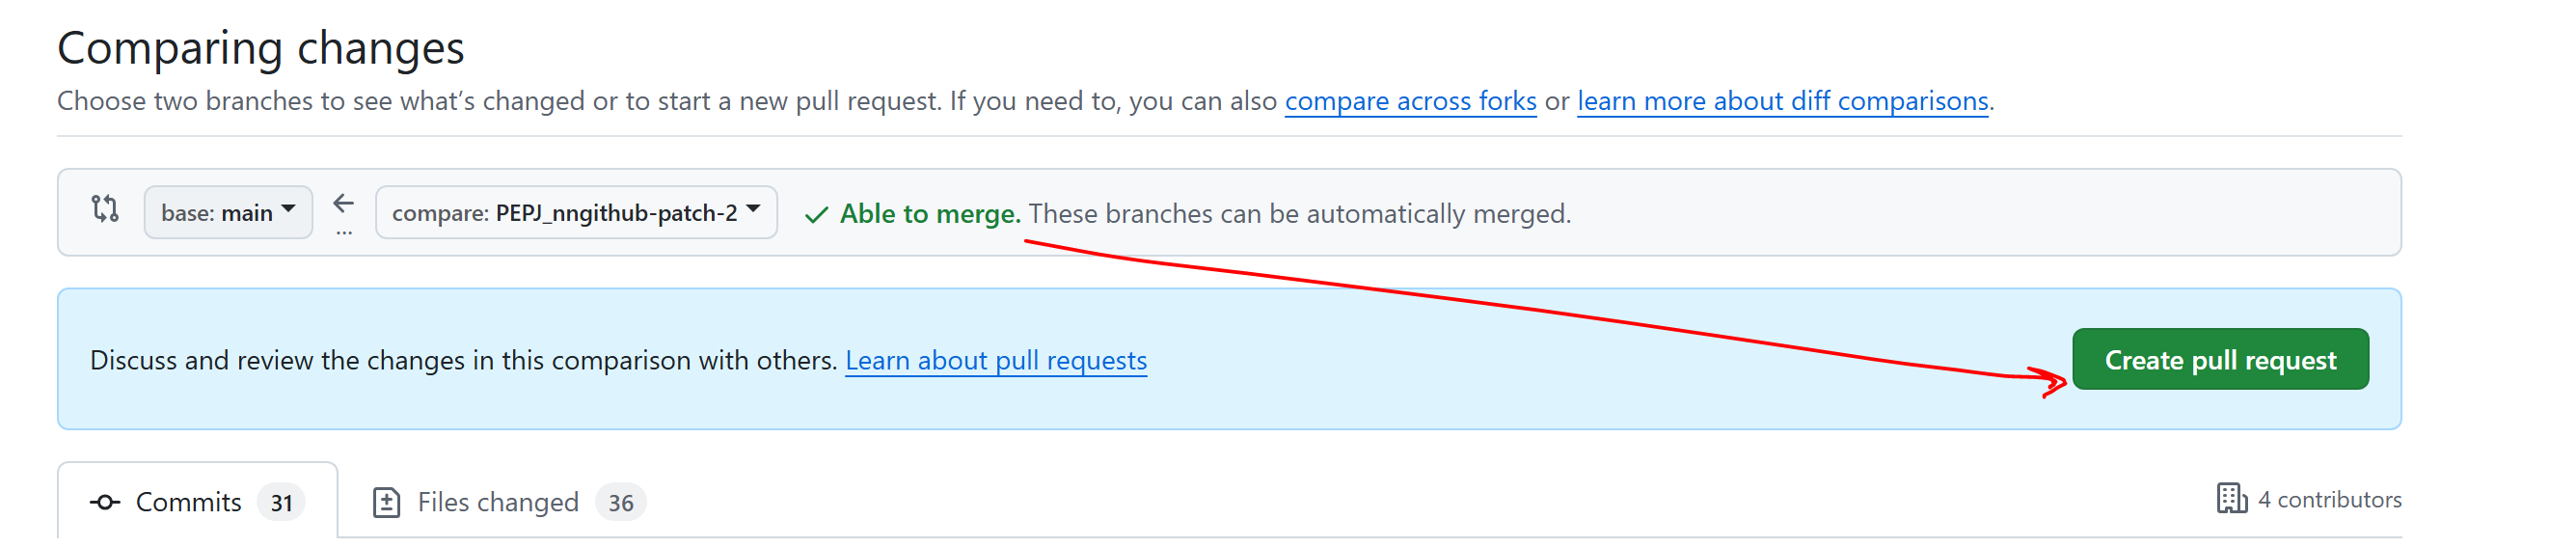
-
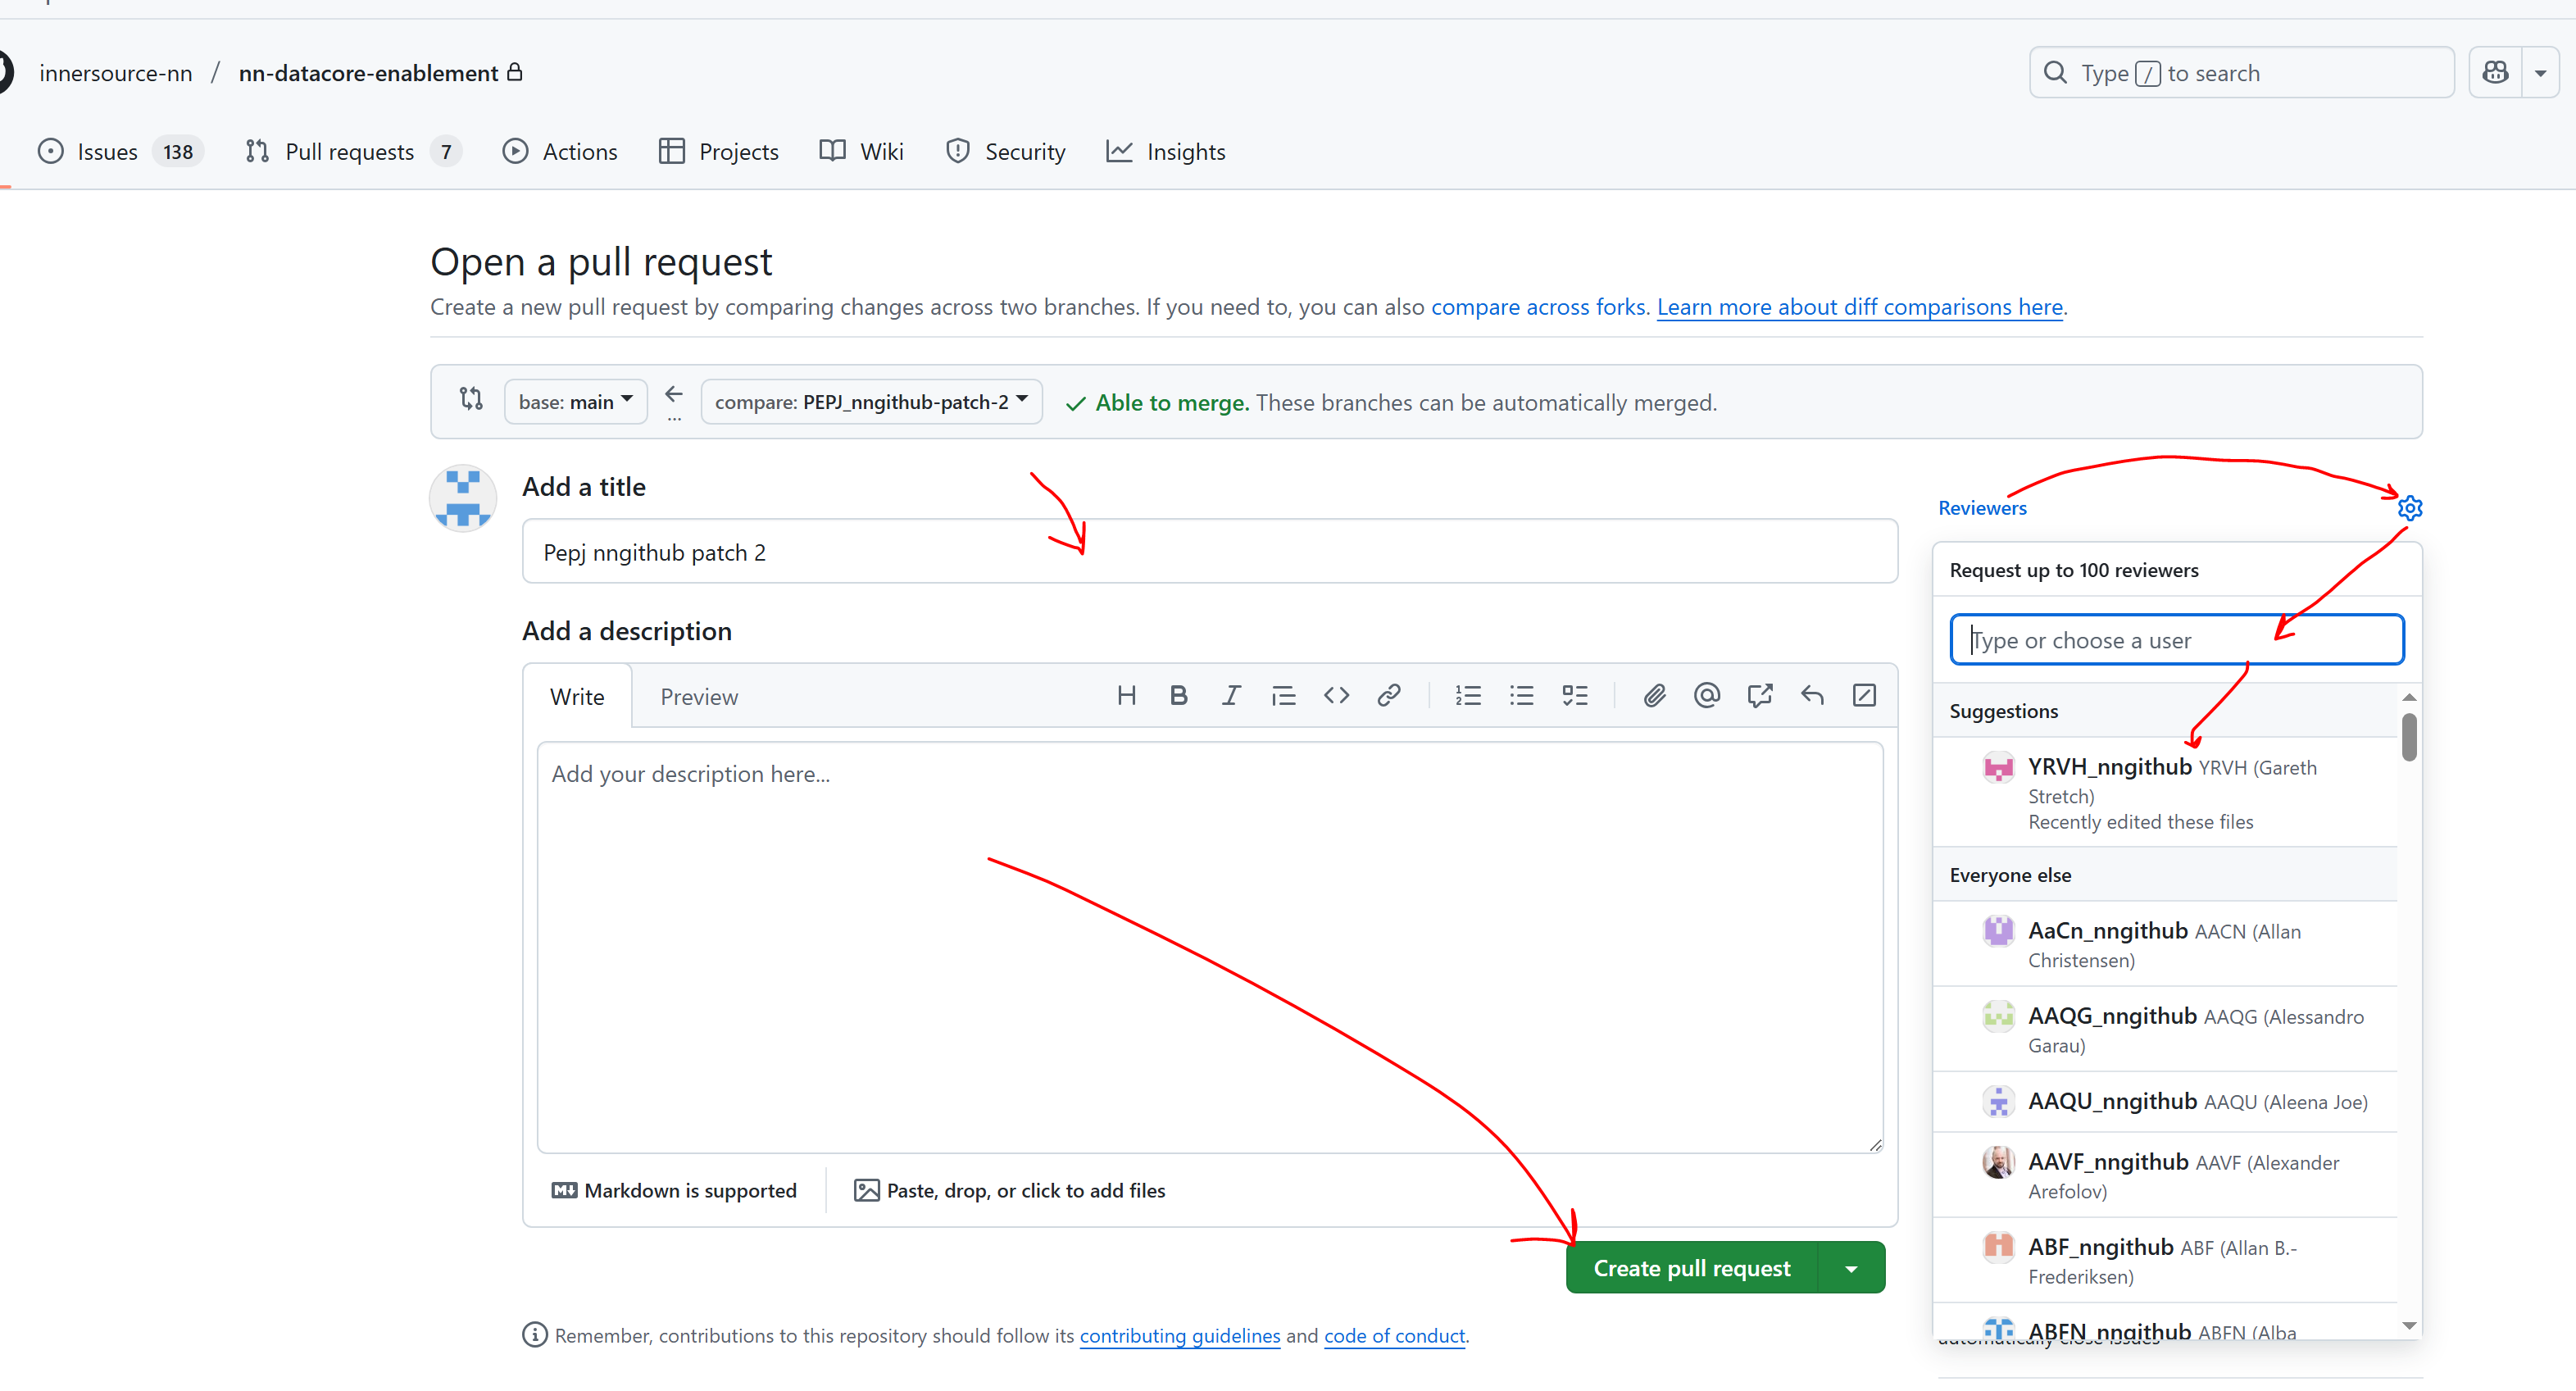
Adjust the PR details:
* The Title for the PR is usually auto-populated based on your latest commit message, but you can edit it if needed.
* Add a description – It's helpful to elaborate, especially if the PR contains multiple commits. -
Request a review:
* Best practice is to require approval from at least one reviewer before merging.
* You can request a review from specific team members at this step or later. -
When everything is complete, press "Create pull request".
Once the PR is created, it will appear in the list on the "Pull requests" tab.
Merging the Pull Request#
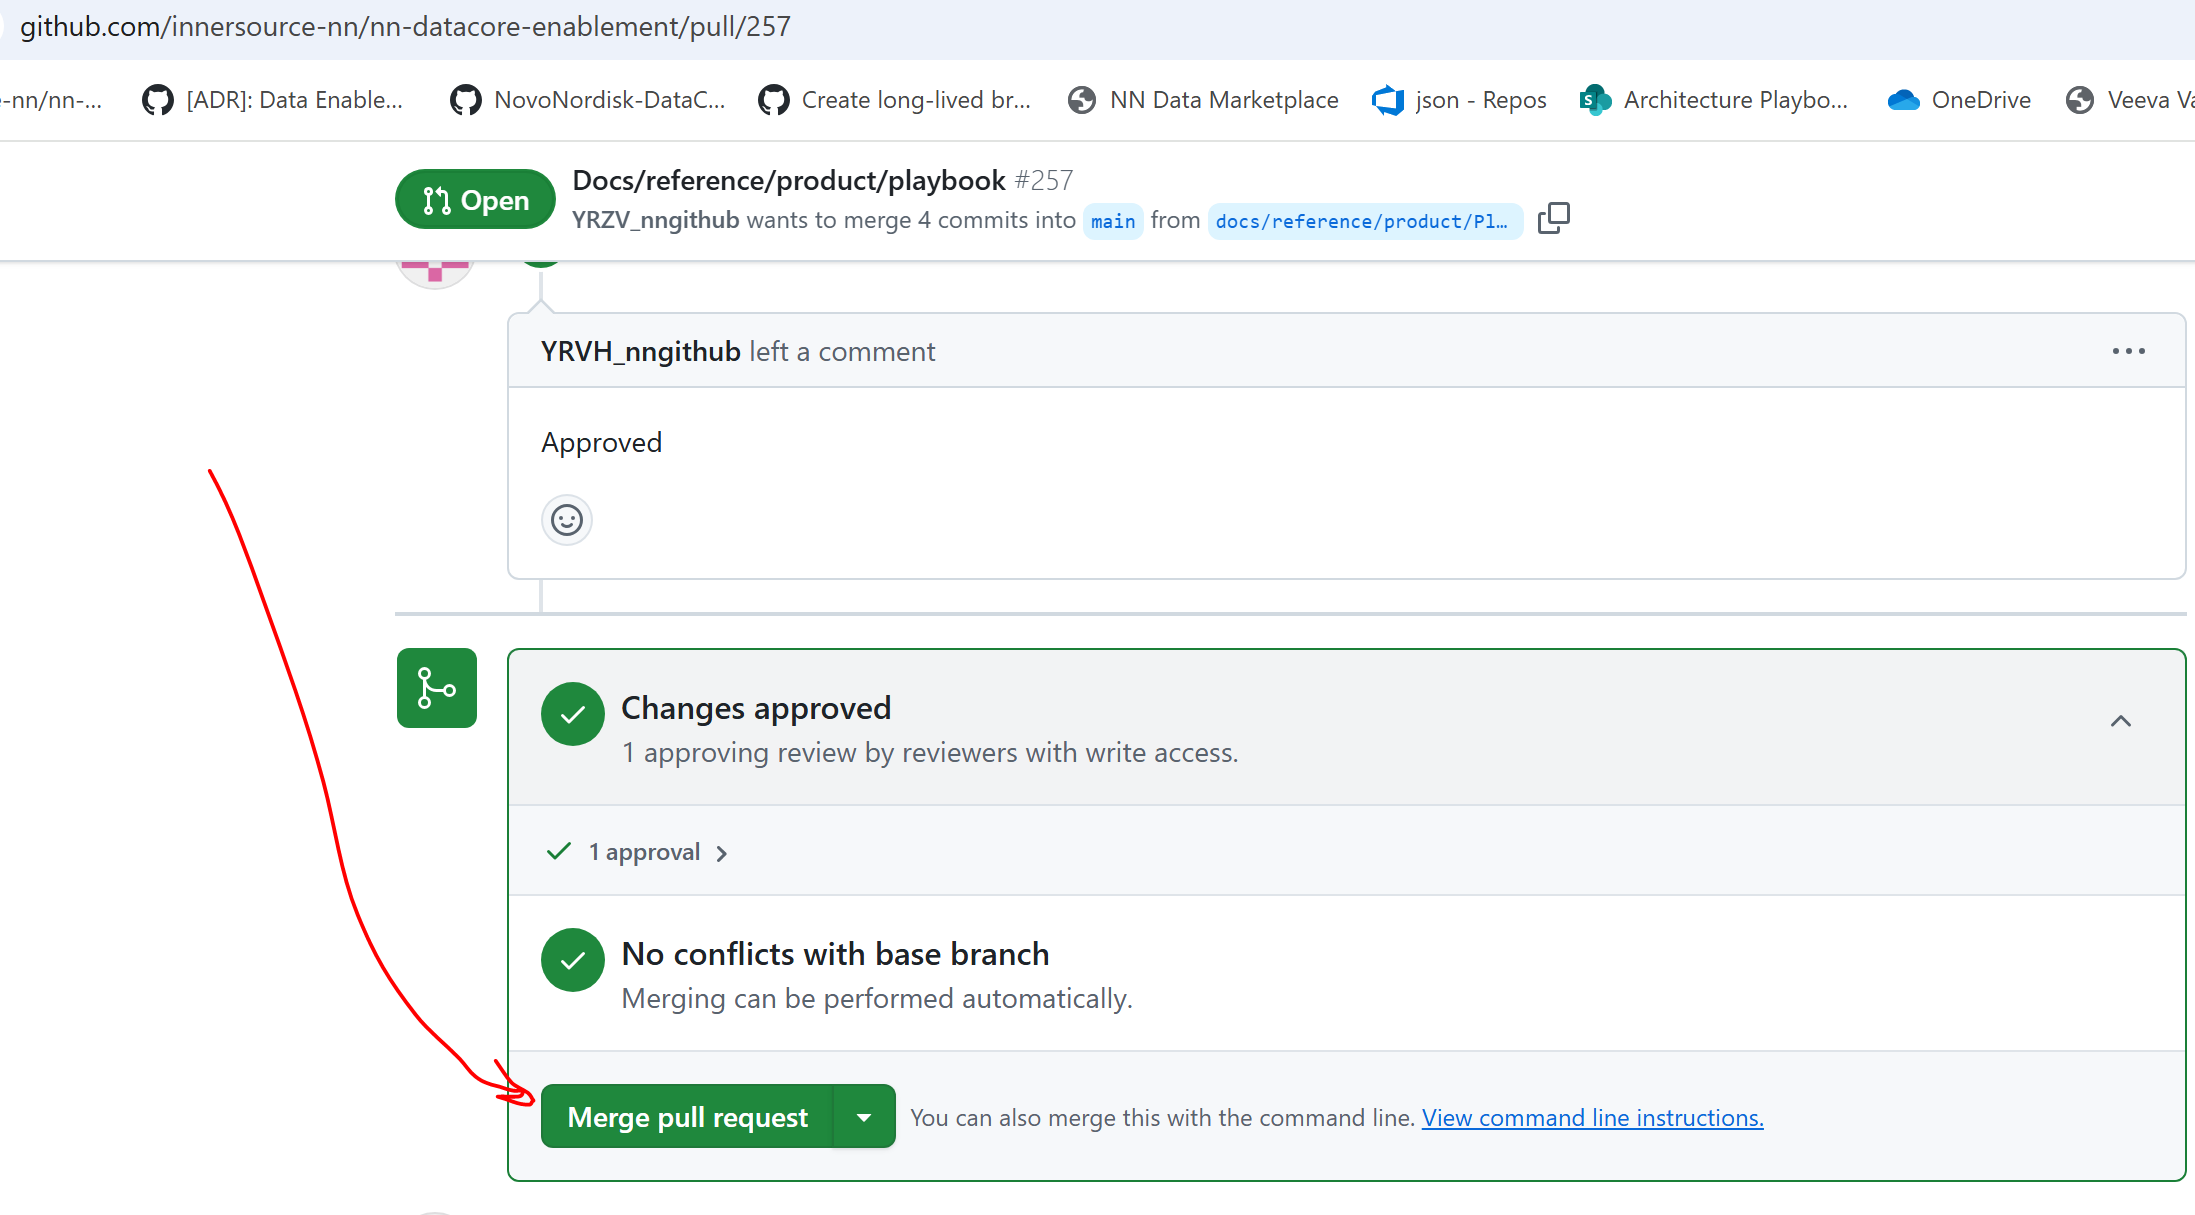
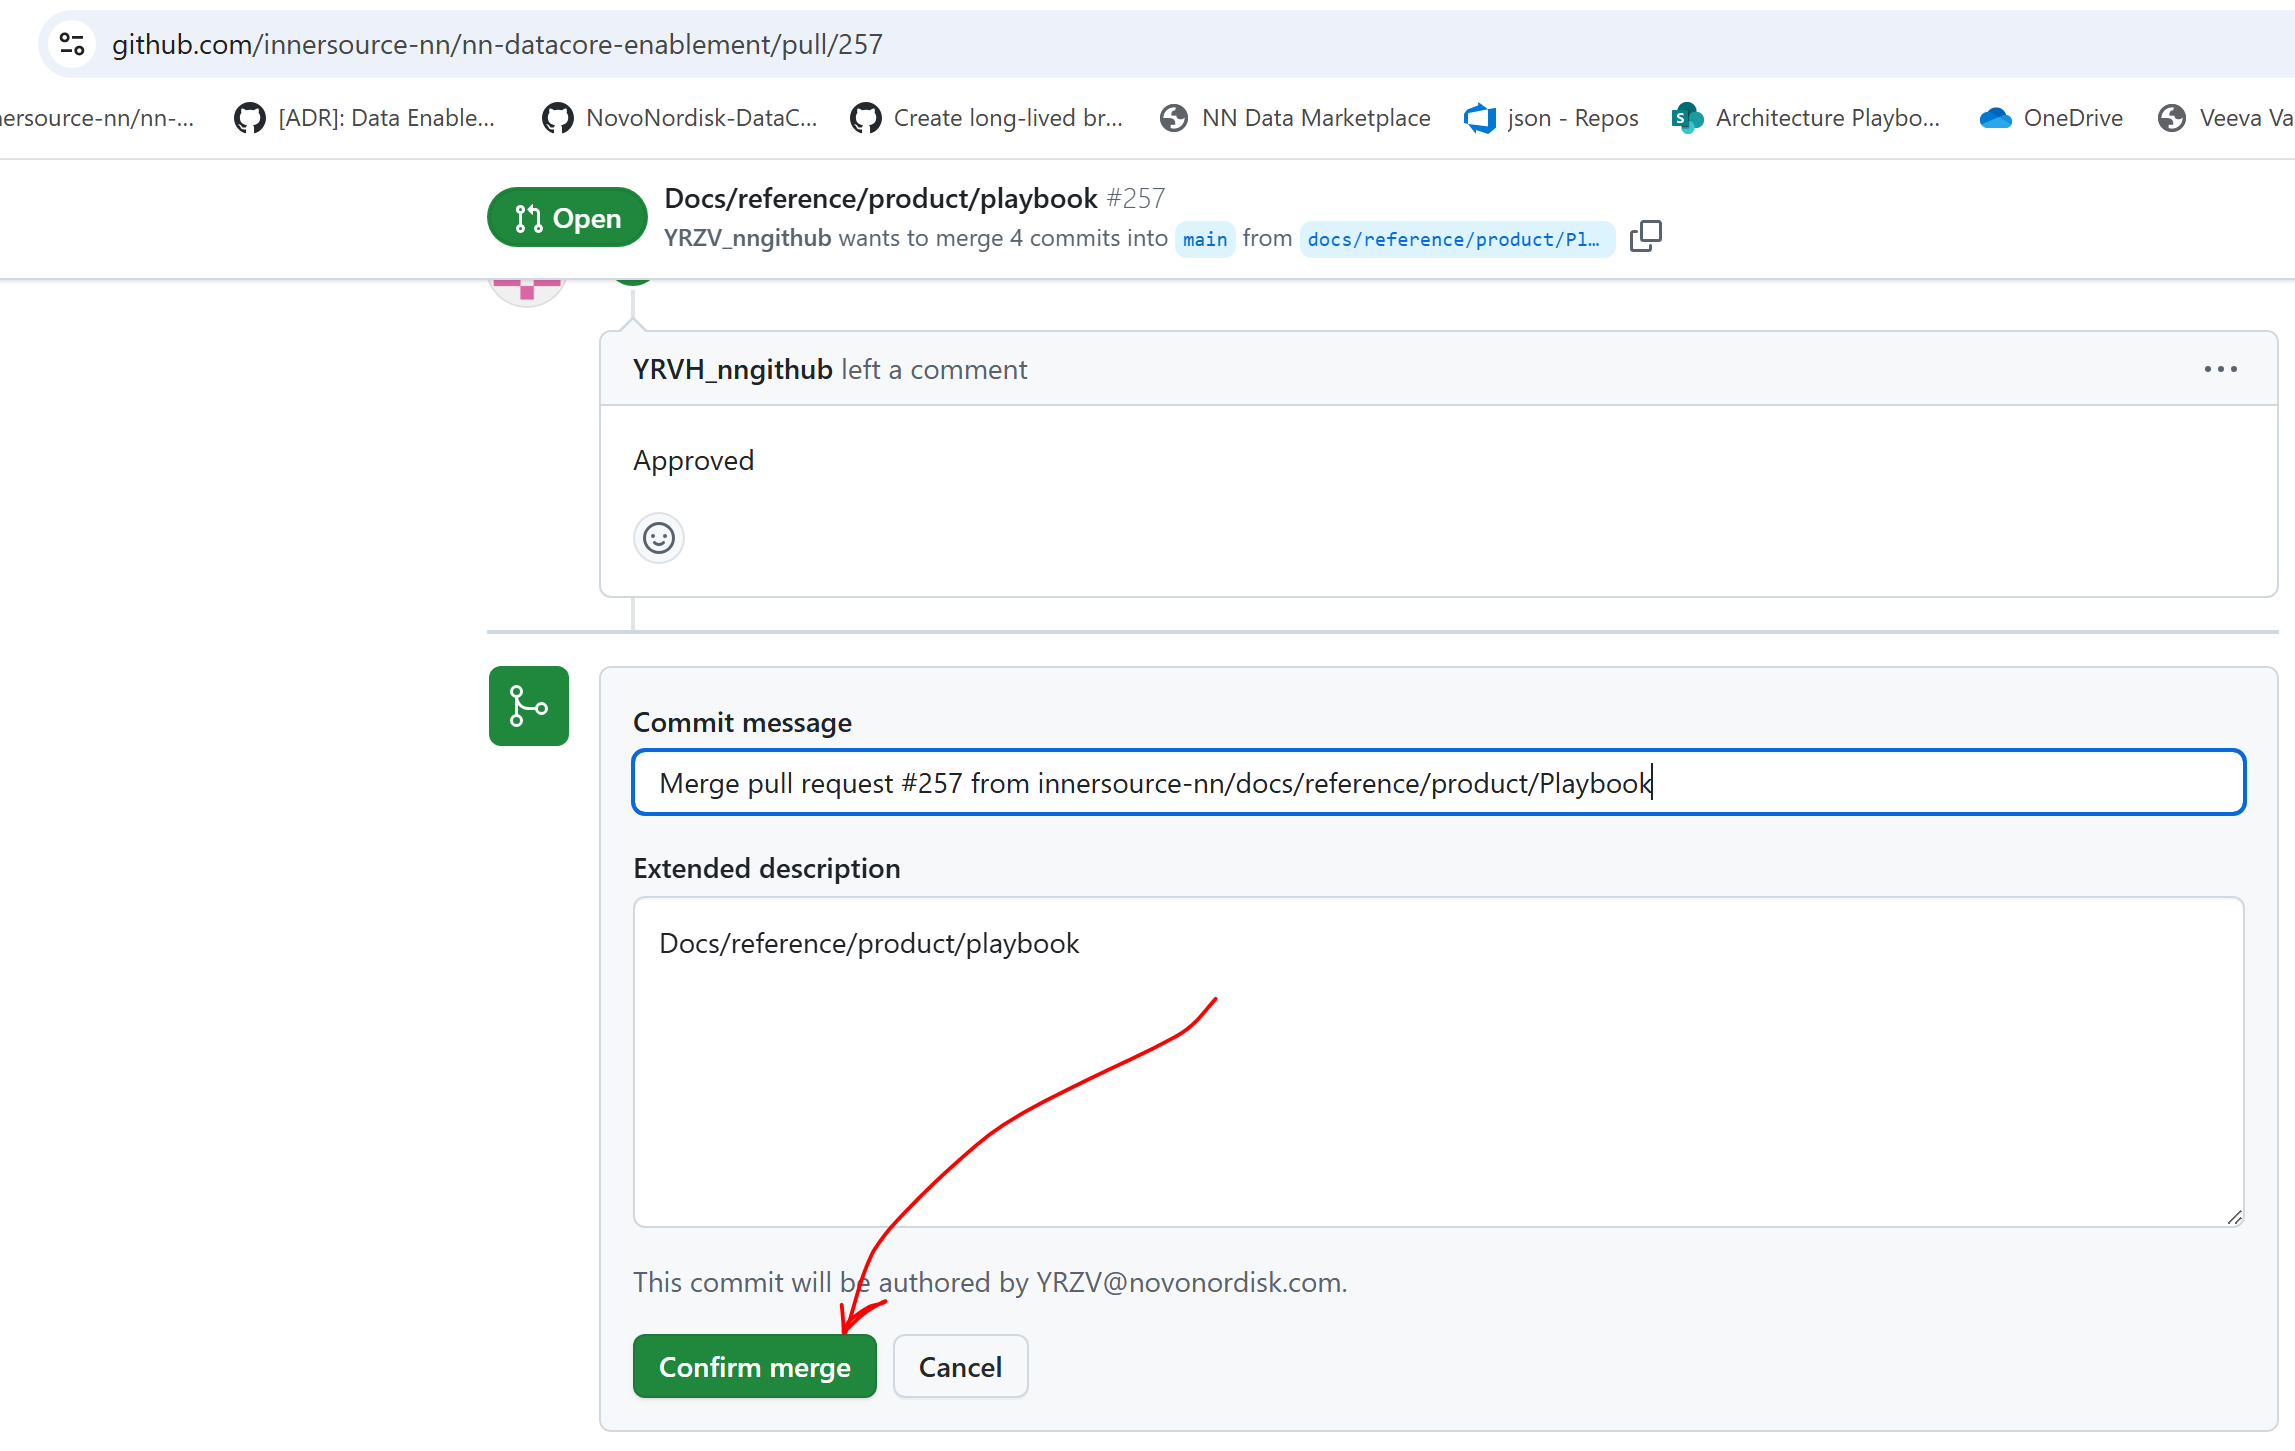
When the PR is approved, a green "Merge pull request" button becomes active on the PR page.
Clicking "Merge pull request" merges the changes from the compare branch into the base branch, completing the pull request.
Reviewing a PR#
- Open your browser and navigate to your repository on GitHub.
-
Go to the "Pull requests" tab, where you'll see a list of open pull requests:
Hold "Alt" / "Option" to enable Pan & Zoom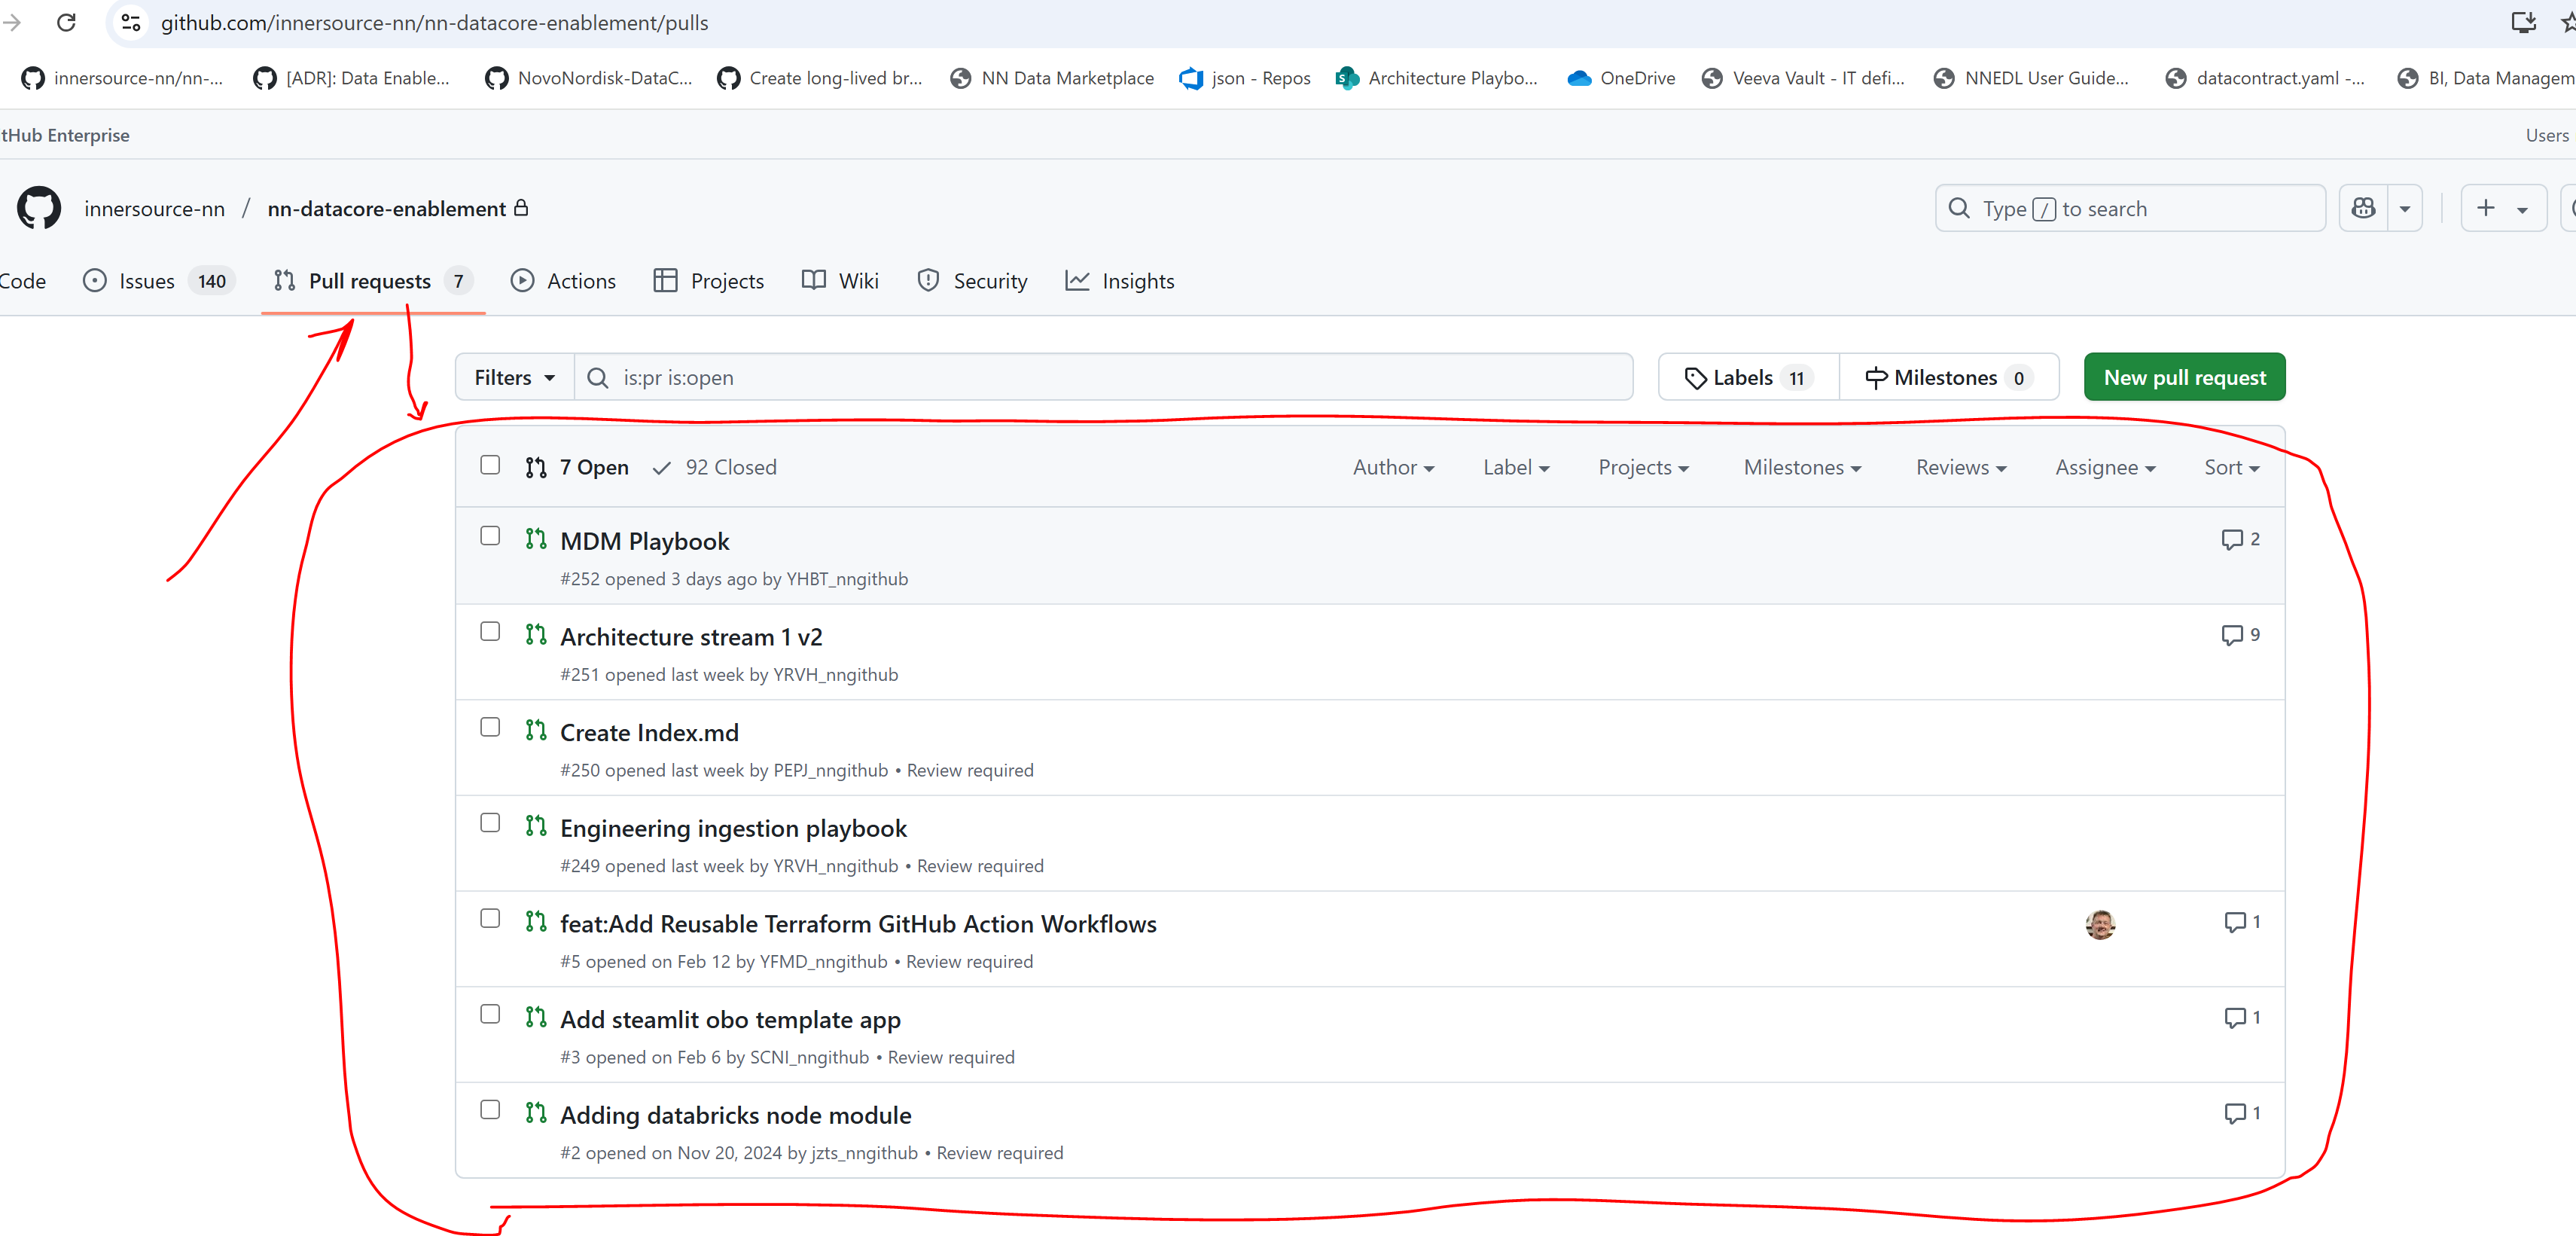
-
Find and click on the PR you want to review.
-
Go to the "Files changed" tab in the PR to view all changes:
Hold "Alt" / "Option" to enable Pan & Zoom
-
Review options:
* You can review and comment on specific changes in individual files:
Hold "Alt" / "Option" to enable Pan & Zoom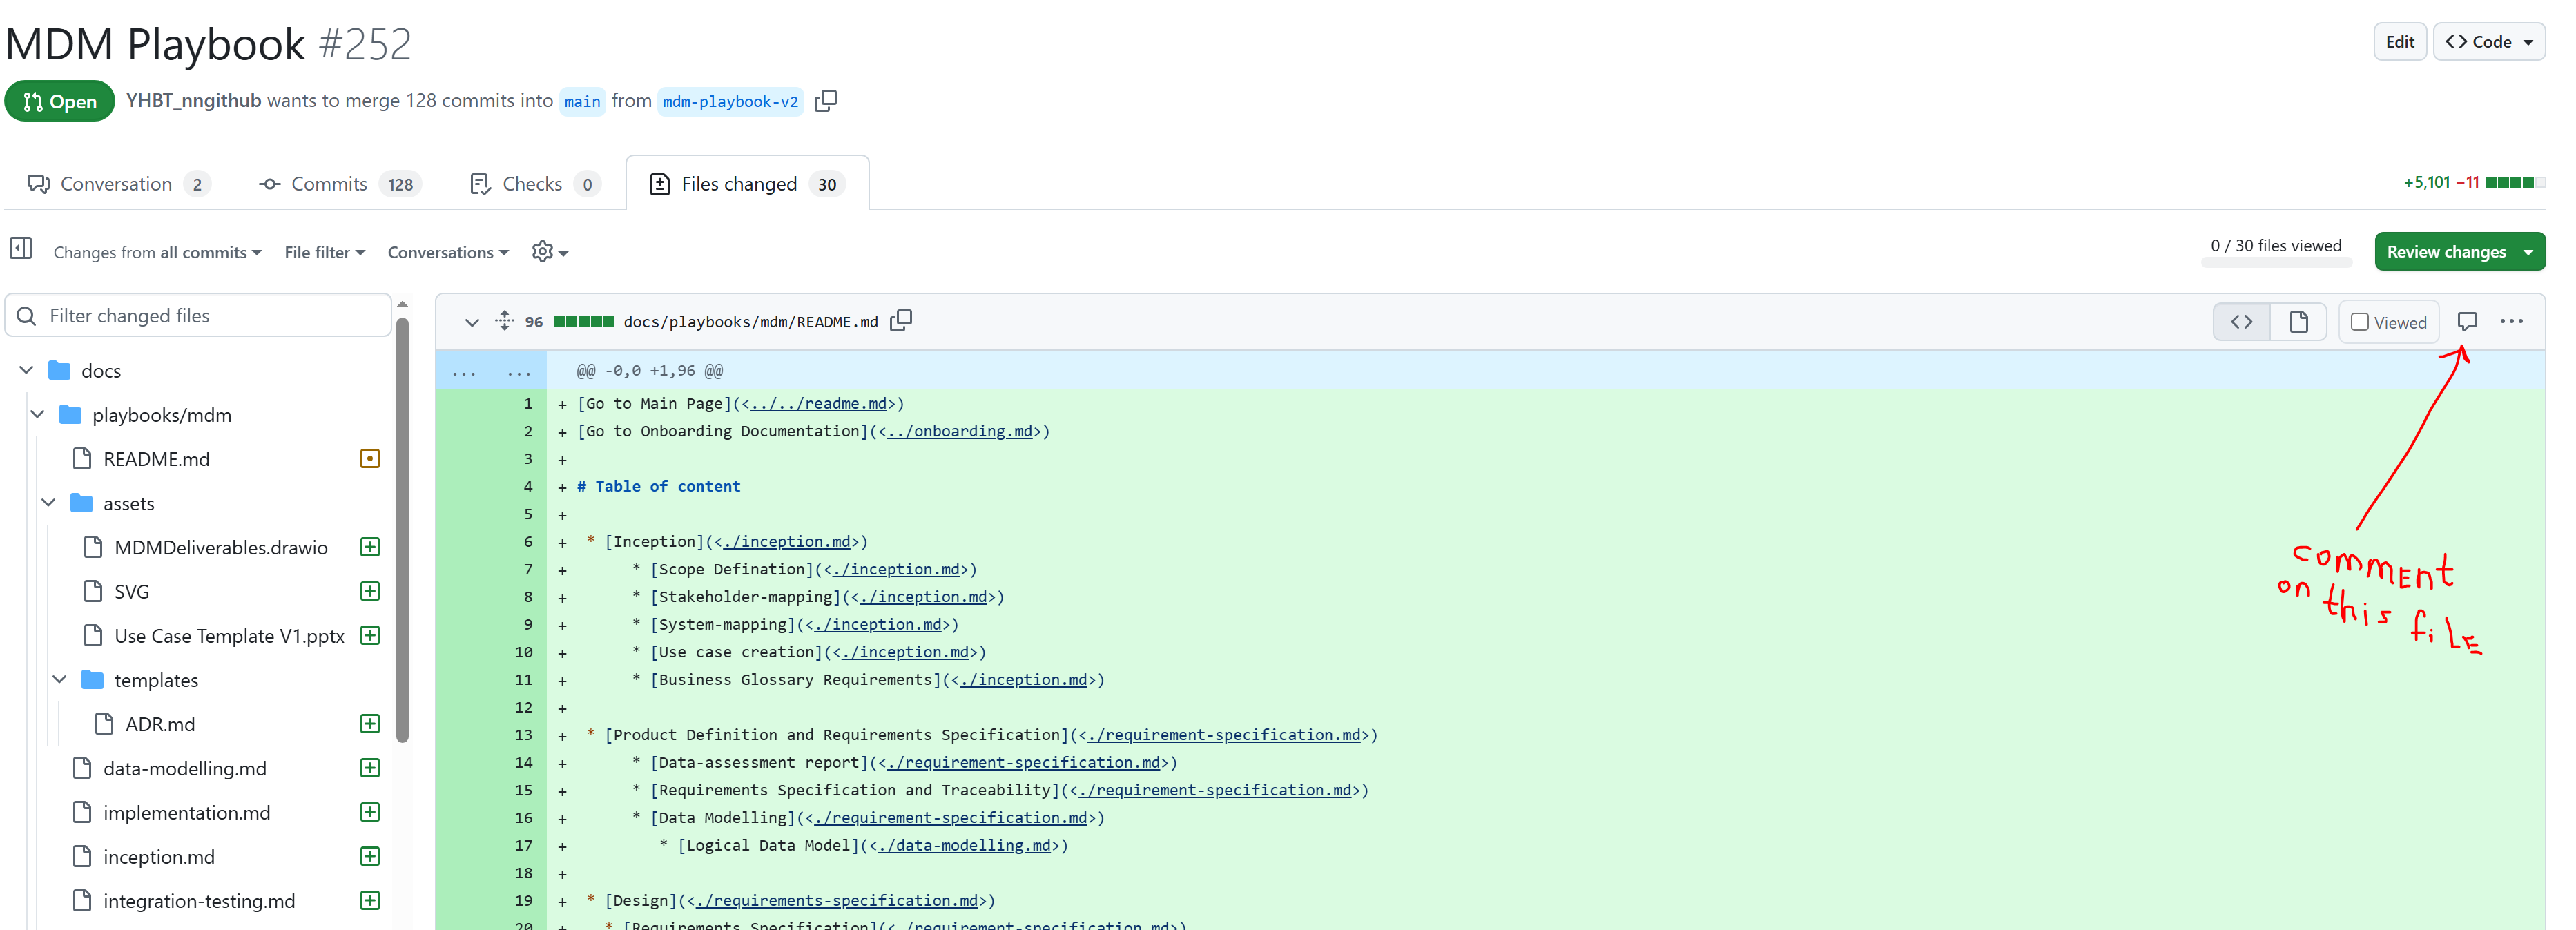
* Alternatively, submit your review for the entire PR by pressing the "Review changes" button and selecting one of the options:- Comment – Leave general feedback.
- Approve – Approve the changes.
- Request changes – Suggest required modifications.
Hold "Alt" / "Option" to enable Pan & Zoom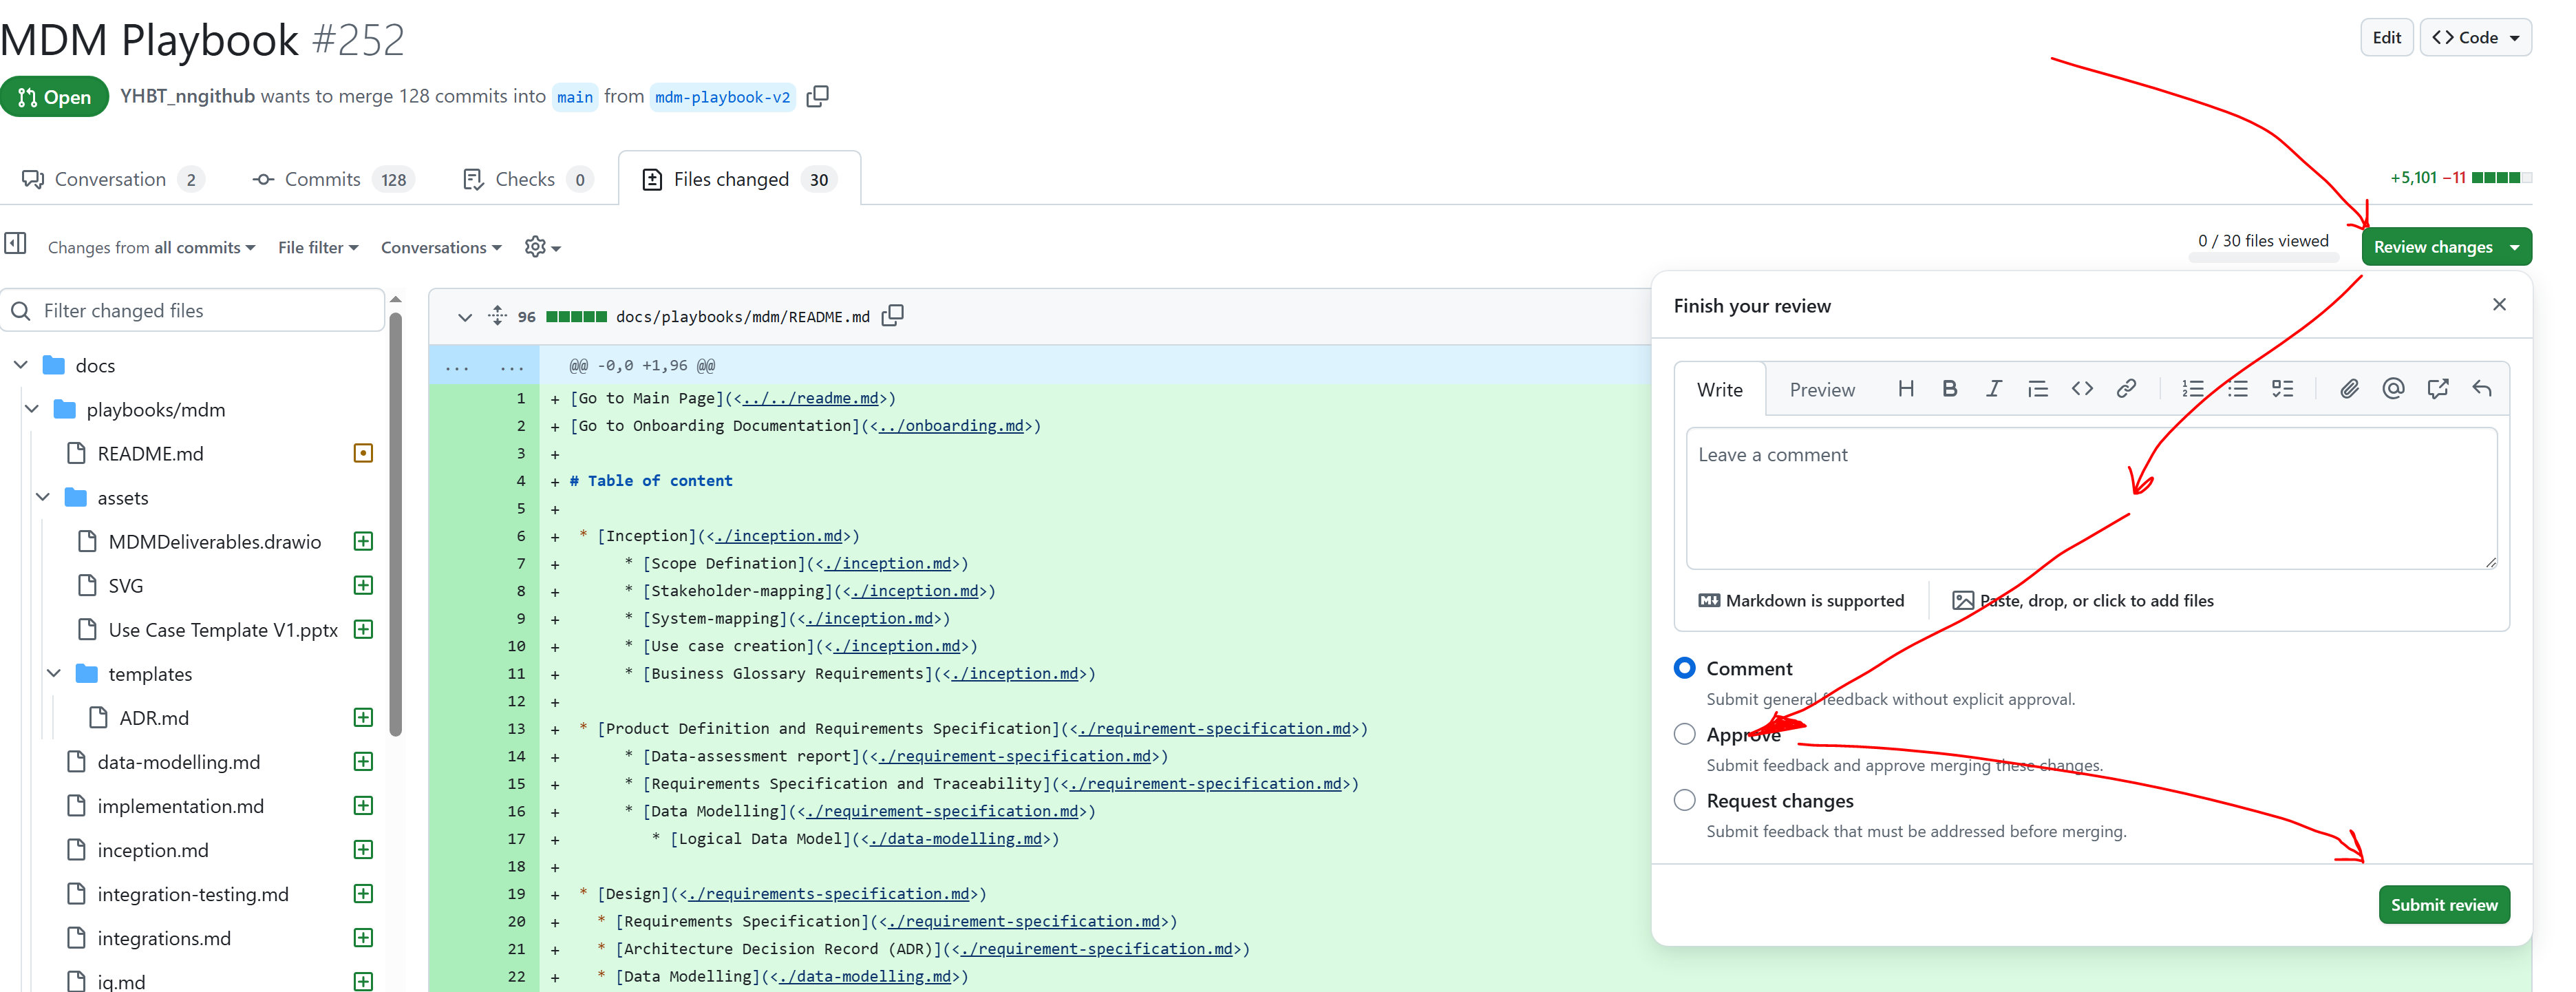
Deleting a branch#
When a branch is no longer used, it should be deleted to avoid the accumulation of abandoned branches, which can create a hard-to-navigate mess.
To delete a branch locally, run the following command: git branch -D {name of the branch}.
The remote branch will remain intact even if the local one is deleted (and vice versa).
To delete a remote branch, run the following command: git push --delete origin {name of the branch}.
Example
git branch -D newbranch
git push --delete origin newbranch
Useful links:#
Go up
Go to Onboarding Topics Reference
Go back to prerequisites